
Baked Cheesy Beef Tacos with Homemade Nacho Cheese Sauce

Crunchy, Cheesy Tacos Made Right in Your Oven
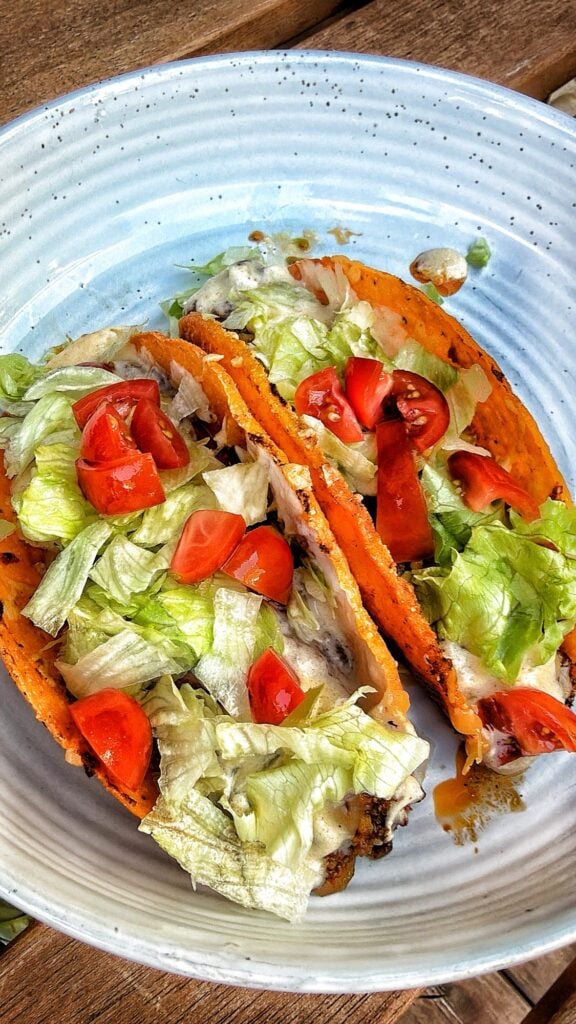
These Baked Cheesy Beef Tacos with Homemade Nacho Cheese Sauce are everything you love about a classic ground beef taco, but with a little extra cheesy goodness. Crunchy taco shells are filled with perfectly seasoned ground beef, topped with plenty of shredded cheese, and baked in the oven until everything is hot and melty. The finishing touch is a homemade nacho cheese sauce that you can drizzle over the tacos or serve on the side for dipping.
This is a great recipe for a family dinner, a football Sunday, or feeding a crowd. You can make the taco meat ahead of time, prepare your toppings, and have everything ready to assemble when it’s time to eat.
I love a good old-fashioned crunchy taco. There’s something about the combination of seasoned ground beef, crunchy shells, shredded lettuce, tomatoes, and cheese that never gets old.
For this recipe, I wanted to take that familiar dinner and make it a little more special without turning it into something complicated. Instead of assembling everyone’s tacos individually, I decided to fill the shells, line them up in a baking dish, cover them with cheese, and bake them all at once.
And because apparently regular melted cheese wasn’t enough for me, I also decided to make a homemade nacho cheese sauce to drizzle over the finished tacos.
The best part is that you can make the cheese sauce in a regular saucepan or small soup pot. No special equipment required.
Before You Jump to the Recipe
- Ground Beef: I use 2 pounds of ground beef for this recipe. You can use 80/20 or 85/15. Just be sure to drain off excess grease before seasoning.
- Crunchy Taco Shells: Use your favorite store-bought hard taco shells. The shells are filled with cooked beef and cheese before going into the oven.
- Keep the Meat Moist, Not Wet: The beef should be juicy and flavorful, but most of the broth needs to cook down so the shells don’t become soggy.
- The Cheese: I like a combination of sharp cheddar and Monterey Jack for the baked tacos. Freshly shredded cheese melts especially well.
- Homemade Nacho Cheese Sauce: This is made separately in a saucepan and can be served over the tacos or on the side.
- Make Ahead: Prepare the beef filling ahead of time and refrigerate it. Assemble and bake the tacos just before serving.
- Add Cold Toppings After Baking: Lettuce, tomatoes, sour cream, and other fresh toppings should be added after the tacos come out of the oven.
Ingredients for Baked Cheesy Beef Tacos
You don’t need anything particularly fancy to make these tacos. Most of the ingredients are things you probably already have in your refrigerator, freezer, or spice cabinet.
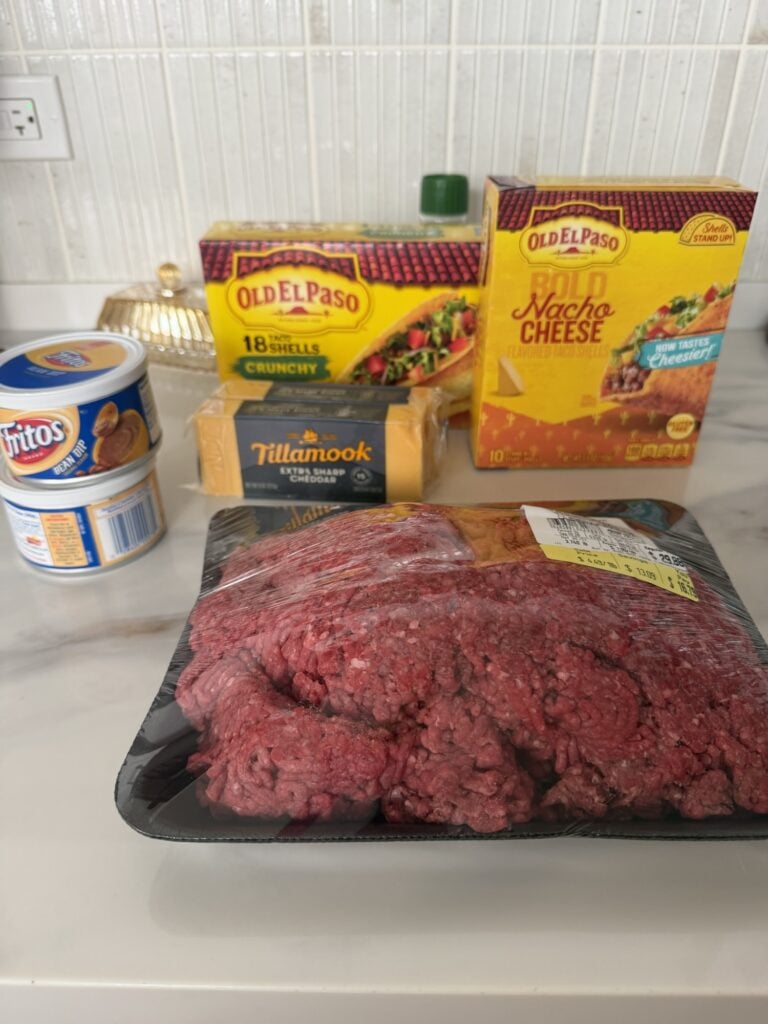
For The Seasoned Ground Beef
2 pounds ground beef
1 medium yellow onion, finely diced
3 cloves garlic, minced
2 tablespoons tomato paste
2 teaspoons chili powder
2 teaspoons paprika
1 1/2 teaspoons ground cumin
1 teaspoon onion powder
1 teaspoon garlic powder
1 teaspoon kosher salt, plus more to taste
1/2 teaspoon black pepper
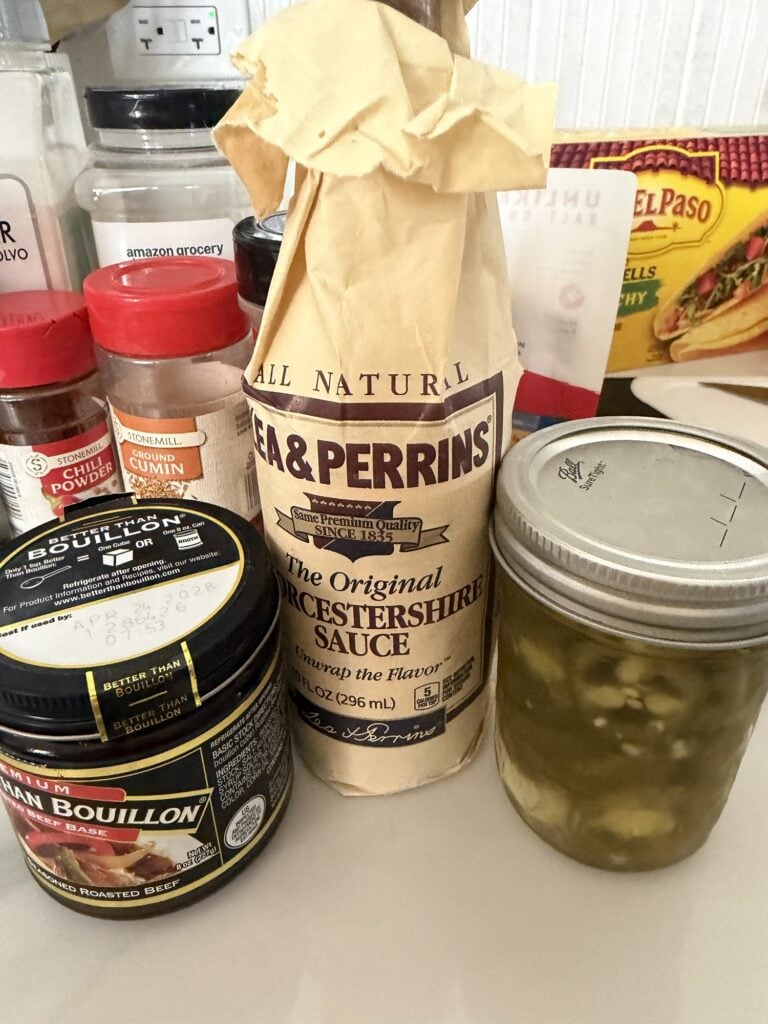
2 teaspoons Worcestershire sauce
1/2 cup beef broth
2 tablespoons pickled jalapeño juice, optional
For The Baked Tacos
16 to 20 crunchy taco shells
3 cups shredded cheddar, Monterey Jack, or Chihuahua cheese
Nonstick cooking spray
For The Homemade Nacho Cheese Sauce
2 tablespoons butter
2 tablespoons all-purpose flour
1 cup whole milk, plus additional milk for thinning
4 ounces cream cheese, softened
1 1/2 cups freshly shredded sharp cheddar cheese
2 tablespoons pickled jalapeño juice
1/2 teaspoon garlic powder
1/2 teaspoon onion powder
1/4 teaspoon paprika
Pinch of ground cumin
Salt to taste
Hot sauce, optional
Optional Taco Toppings
Shredded iceberg lettuce
Diced tomatoes
Sour cream
Pickled jalapeños
Taco sauce
Salsa
Sliced green onions
How to Make Baked Cheesy Beef Tacos
Step 1: Brown the Ground Beef
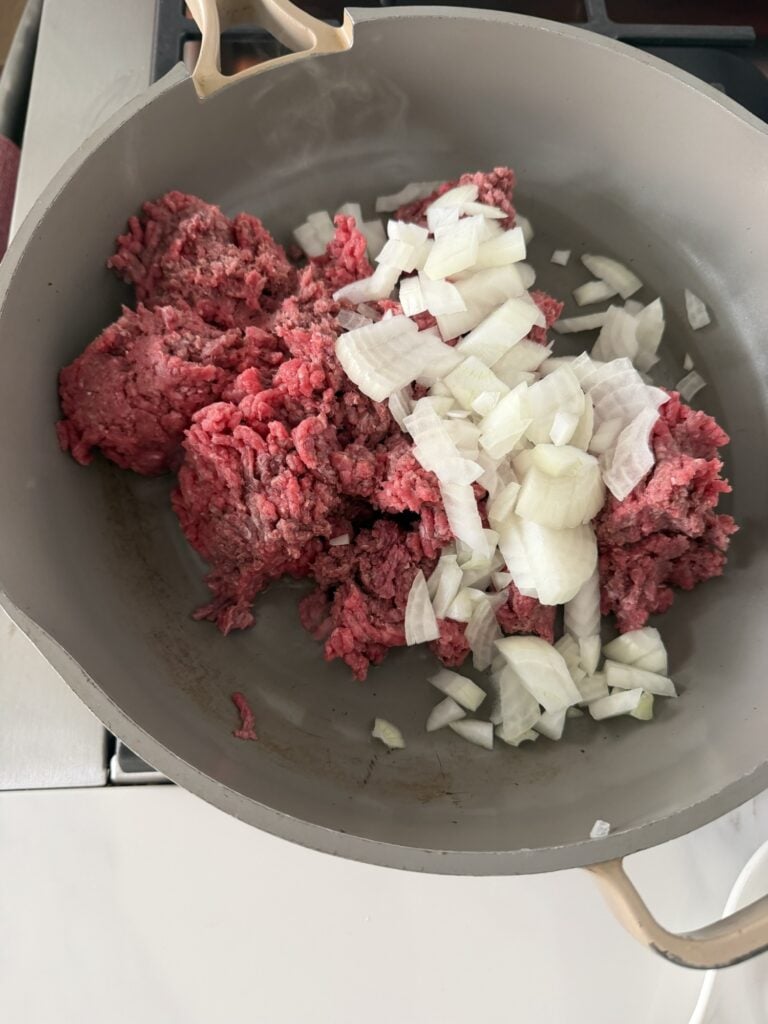
Add the ground beef and diced onion to a large skillet over medium-high heat. Cook, breaking the beef into small crumbles as it browns. Once the beef is cooked through and the onion has softened, drain off the excess grease.
I like breaking the beef into fairly small pieces for this recipe. It makes it easier to fill the crunchy taco shells, and you get a little bit of the seasoned beef in every bite.
Step 2: Season the Beef
Add the minced garlic and cook for about 30 seconds. Stir in the tomato paste, chili powder, paprika, cumin, onion powder, garlic powder, kosher salt, and black pepper. Cook for another minute, stirring well to coat the meat.
The tomato paste adds a little richness to the beef without making it taste like tomato sauce. Cooking the spices briefly with the meat also helps bring out their flavor.
Step 3: Add the Broth and Simmer
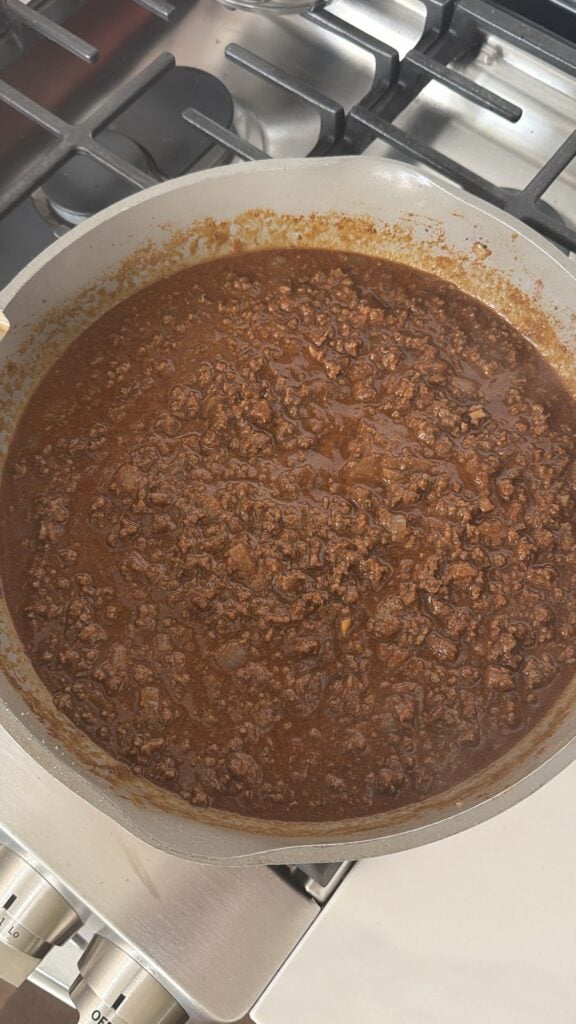
Stir in the Worcestershire sauce, beef broth, and pickled jalapeño juice, if using. Reduce the heat and simmer uncovered for approximately 5 to 7 minutes, or until most of the liquid has cooked down.
You want the beef to be moist but not swimming in liquid. This is especially important when using crunchy taco shells because excess moisture can make the bottoms of the shells soft.
Why I Add Worcestershire Sauce and Jalapeño Juice
Worcestershire sauce is one of my favorite ingredients to add to ground beef. It gives the meat a savory flavor without overpowering the other seasonings.
The pickled jalapeño juice is another little trick. It adds some acidity that balances the richness of the beef and cheese. You don’t need to add actual jalapeños unless you want the extra heat.
If you don’t have either ingredient, you can still make the tacos. The beef will be delicious with the remaining seasonings.
How to Assemble and Bake Crunchy Tacos
Step 4: Arrange the Taco Shells
Preheat the oven to 375°F.
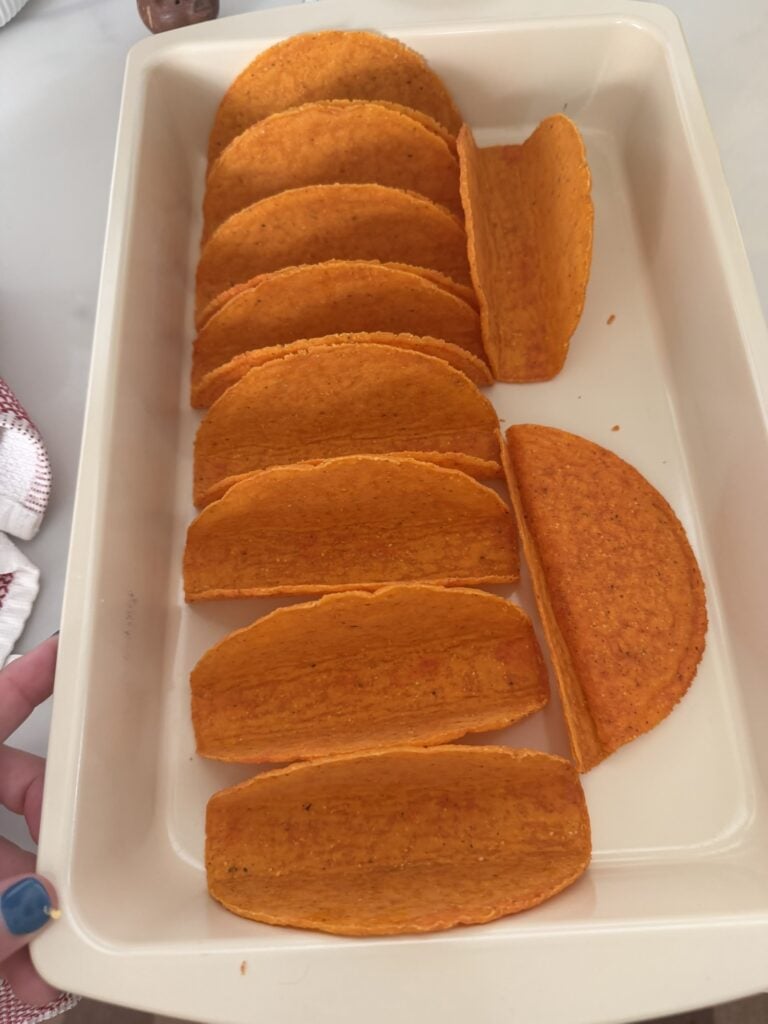
Lightly spray a 9 x 13-inch baking dish with nonstick cooking spray. Arrange the crunchy taco shells upright in the dish, placing them close enough together that they help support one another. Use a second baking dish if necessary.
I like this method because you can assemble a whole bunch of tacos at once instead of standing at the counter filling them individually while everyone else is already eating.
Step 5: Fill the Tacos
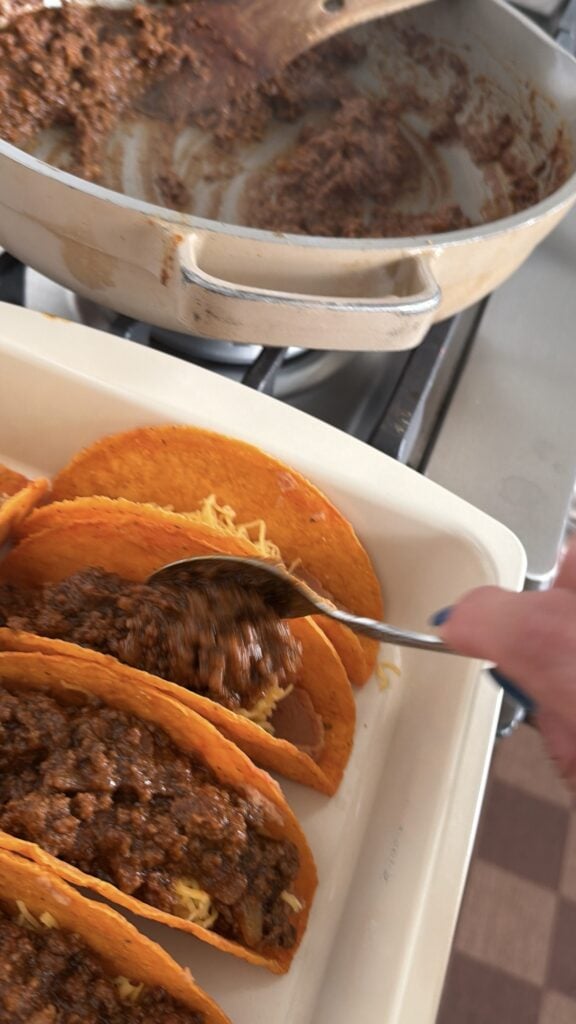
Add a small pinch of shredded cheese to the bottom of each shell. Spoon the seasoned ground beef into the shells, filling them approximately two-thirds full.
The little bit of cheese on the bottom is something I wanted to try to help separate the beef from the shell. It also adds another layer of melted cheese, which certainly doesn’t hurt anything.
Step 6: Add the Cheese and Bake
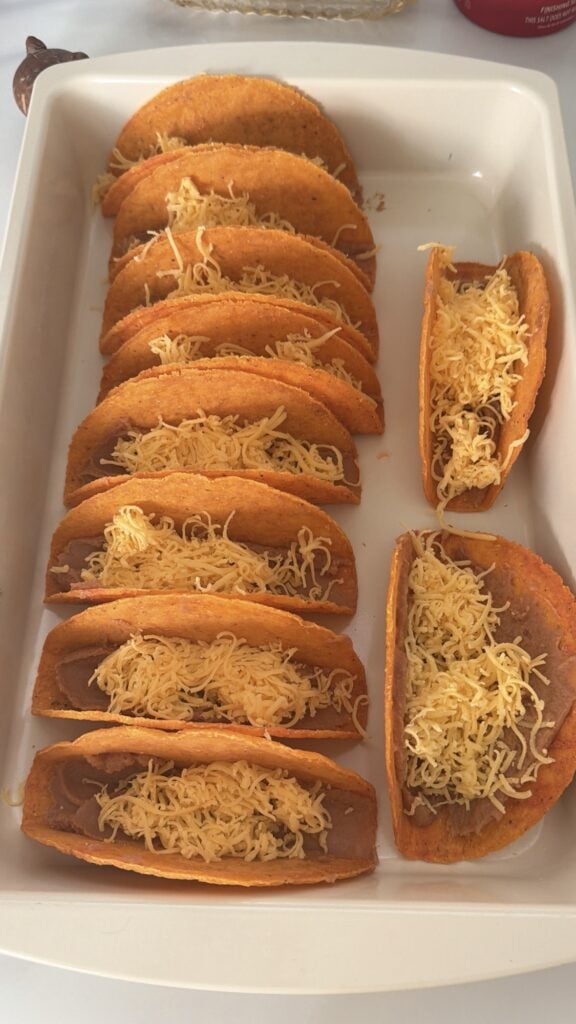
Divide the remaining shredded cheese evenly over the filled tacos. Bake uncovered at 375°F for approximately 8 to 12 minutes, or until the cheese has melted and the taco shells are heated through.
Since the ground beef is already fully cooked, the tacos don’t need to spend a long time in the oven. You are simply heating the shells and melting the cheese.
Homemade Nacho Cheese Sauce
This is what takes these baked tacos from a regular weeknight dinner to something a little more fun.
You could certainly use a jar of nacho cheese sauce if you’re short on time, but this homemade version is easy to prepare and uses ingredients you can find at almost any grocery store.
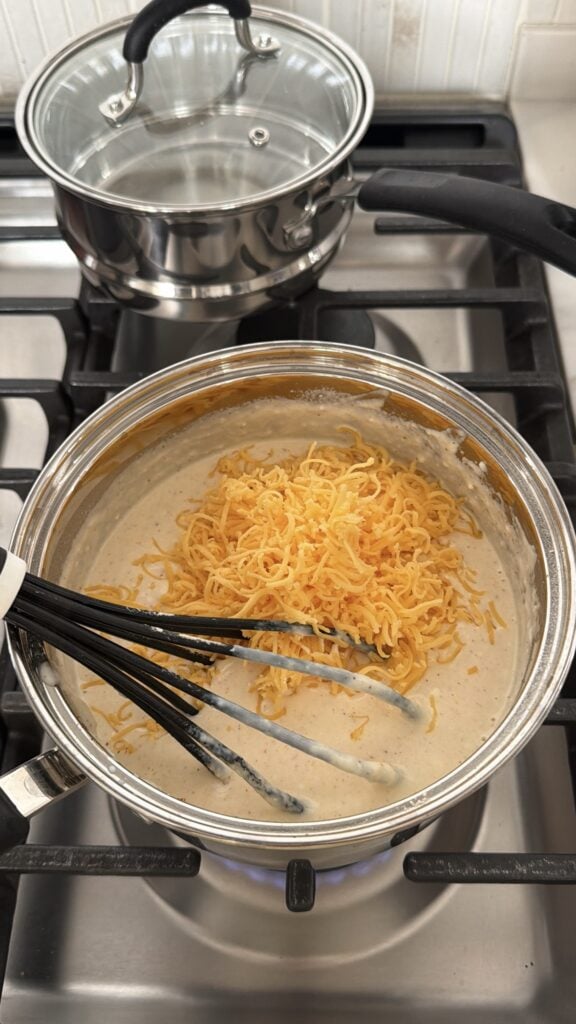
I like making it in a saucepan or small soup pot rather than a skillet. The higher sides make whisking easier, and you have more control over the heat.
Step 1: Make the Butter and Flour Base
Melt 2 tablespoons of butter in a medium saucepan over medium-low heat. Add 2 tablespoons of flour and whisk continuously for about 1 minute.
You want the flour to cook slightly, but you don’t want it to brown.
Step 2: Add the Milk
Slowly whisk in 1 cup of whole milk. Continue whisking for approximately 2 to 3 minutes, or until the mixture begins to thicken slightly.
Step 3: Melt the Cheese
Reduce the heat to low. Add the softened cream cheese and whisk until smooth.
Add the shredded cheddar a handful at a time, stirring until each addition has melted before adding more.
Do not let the sauce boil once the cheese has been added. Too much heat can cause the cheese to separate or become grainy.
Step 4: Season and Thin the Sauce
Stir in the pickled jalapeño juice, garlic powder, onion powder, paprika, and cumin. Add hot sauce if desired.
Taste the sauce before adding salt because the cheese and jalapeño brine already contain salt.
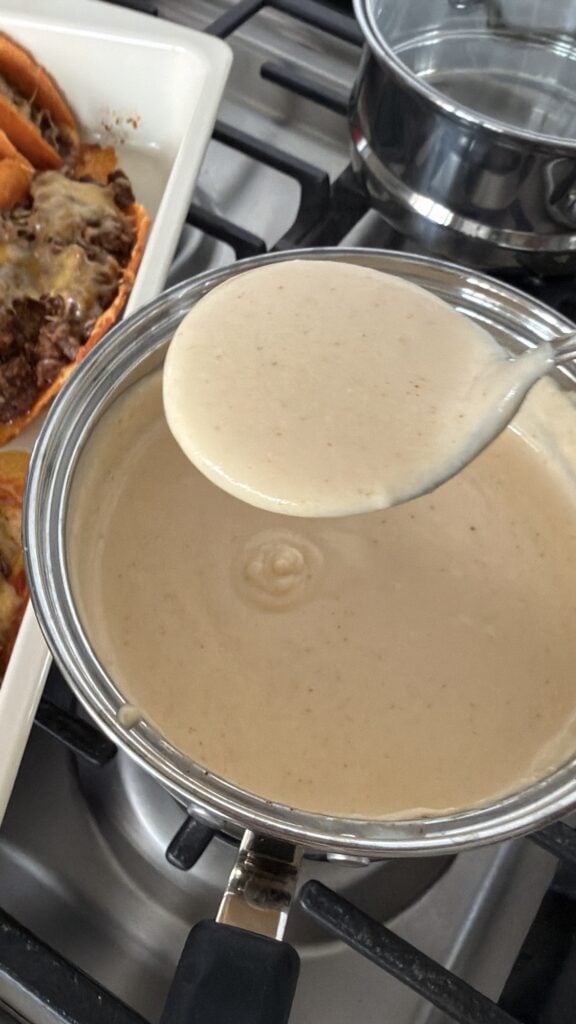
For these tacos, I prefer a sauce that’s a little thinner than a traditional queso dip. Add warm milk, 1 tablespoon at a time, until the sauce pours easily from a spoon.
How to Serve the Baked Tacos
Once the tacos come out of the oven, let them rest for a couple of minutes before adding the toppings.
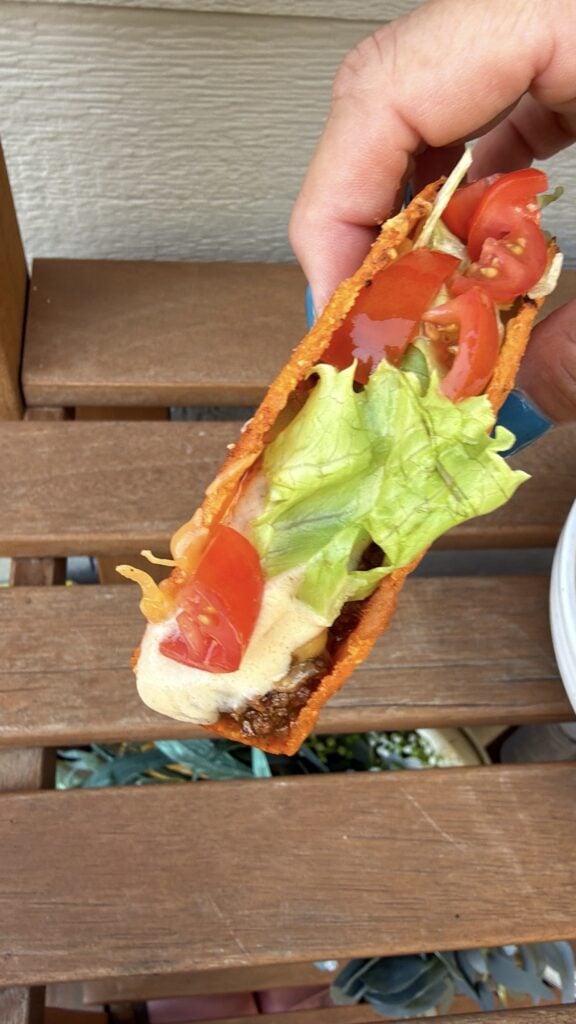
I like to set out bowls of shredded iceberg lettuce, diced tomatoes, sour cream, pickled jalapeños, and taco sauce so everyone can dress their tacos however they like.
Then comes the best part: the warm nacho cheese sauce.
You can drizzle it directly over the finished tacos or serve it in a bowl on the side. Serving it separately is especially helpful if you’re feeding a crowd because people can add as much or as little as they want.
Tips for Keeping Baked Tacos Crunchy
The biggest challenge with baking crunchy tacos is preventing the shells from becoming soggy. Fortunately, there are a few simple things you can do.
First, make sure the beef filling isn’t too wet. The broth should mostly cook down before you fill the shells. Second, assemble the tacos shortly before baking rather than letting the filled shells sit around for an extended period.
I also recommend adding the cold toppings and nacho cheese sauce right before eating. If you pour the cheese sauce over all the tacos and let them sit, the shells will eventually soften.
Make-Ahead Tips
The seasoned ground beef can be prepared up to 3 days ahead of time and stored in an airtight container in the refrigerator.
When you’re ready to make the tacos, reheat the beef until steaming hot, adding a small splash of broth if needed. Fill the shells, add the cheese, and bake as directed.
The nacho cheese sauce can also be made ahead and refrigerated for up to 3 days. Reheat it gently in a saucepan over low heat, whisking in a little milk as necessary to bring back its creamy consistency.
For the best texture, I don’t recommend assembling the crunchy tacos hours ahead of time. The shells are best when they’re filled and baked shortly before serving.
What to Serve with Baked Cheesy Beef Tacos
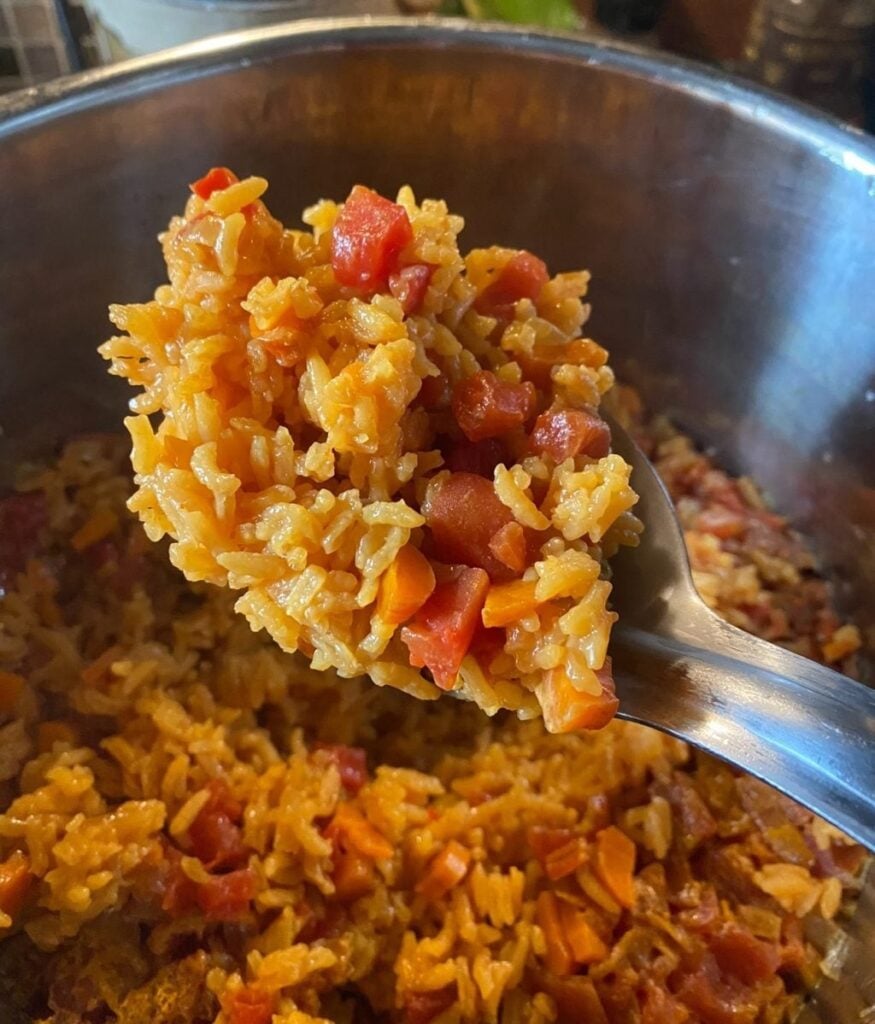
These tacos are filling enough to serve as a meal on their own, but they would also be great with Mexican-style rice, refried beans, corn salad, or a simple green salad.
They’re also perfect for football Sundays or casual parties. You can put out the toppings buffet-style and let everyone customize their own tacos.

Frequently Asked Questions
Can I use soft tortillas instead of crunchy taco shells?
Yes, but the finished texture will be different. This recipe is specifically designed for crunchy shells. Soft flour tortillas will remain softer when baked, although the edges may become lightly toasted.
Can I use ground chicken or ground turkey?
Absolutely. Ground chicken would be a great substitute. Because it is typically leaner than ground beef, you may want to add a little olive oil when browning it. Cook poultry to 165°F.
Can I use packaged taco seasoning?
Yes. If you prefer, you can substitute your favorite packaged taco seasoning for the dry spices. Follow the seasoning package’s guidance for 2 pounds of beef, adjusting the broth and salt as needed.
Can I make the tacos ahead of time?
You can make the beef ahead of time, but I recommend waiting to fill the crunchy shells until you’re ready to bake them. This helps keep them crisp.
Can I use store-bought nacho cheese sauce?
Of course. Homemade cheese sauce is delicious, but a good-quality jarred nacho cheese sauce works when you’re short on time.
Why is my nacho cheese sauce grainy?
Cheese sauce can become grainy when it’s heated too quickly or allowed to boil after adding the cheese. Keep the heat low and add the shredded cheese gradually. Freshly shredded cheddar generally melts more smoothly than some packaged shredded cheeses.
How do I thin the cheese sauce?
Whisk in a tablespoon of warm milk at a time until you reach the desired consistency. The sauce will naturally thicken as it cools.
Can I freeze the taco meat?
Yes. The cooked and cooled seasoned beef can be frozen in an airtight, freezer-safe container for up to 3 months for best quality. Thaw in the refrigerator and reheat thoroughly before assembling the tacos.
How do I store leftover baked tacos?
Remove any cold toppings and refrigerate leftover tacos promptly in an airtight container for up to 3 to 4 days. Reheat in a 350°F oven until hot. The shells may not be quite as crunchy as when freshly made.
A Fun Twist on Taco Night
Sometimes it’s the little changes to an ordinary dinner that make it feel like something new. Baking these tacos all together is convenient, and the combination of seasoned ground beef, crunchy shells, melted cheese, and homemade nacho cheese sauce makes them extra satisfying.
I also love that this recipe makes enough for a crowd without requiring you to stand over the stove making individual tacos.
Put out your favorite toppings, bring the baking dish to the table, and let everyone dig in.
And definitely make the cheese sauce. That’s the part that makes these tacos extra special.
Baked Cheesy Beef Tacos with Homemade Nacho Cheese Sauce
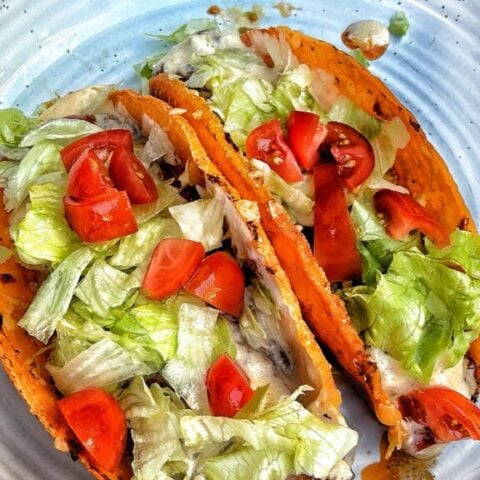
Crunchy baked beef tacos filled with seasoned ground beef and melted cheese, then topped with a creamy homemade nacho cheese sauce. An easy, cheesy family dinner perfect for taco night or feeding a crowd.
Ingredients
Seasoned Beef
- 2 pounds ground beef
- 1 medium yellow onion, diced
- 3 cloves garlic, minced
- 2 tablespoons tomato paste
- 2 teaspoons chili powder
- 2 teaspoons paprika
- 1 1/2 teaspoons ground cumin
- 1 teaspoon onion powder
- 1 teaspoon garlic powder
- 1 teaspoon kosher salt
- 1/2 teaspoon black pepper
- 2 teaspoons Worcestershire sauce
- 1/2 cup beef broth
- 2 tablespoons pickled jalapeño juice, optional
Tacos
- 16 to 20 crunchy taco shells
- 3 cups shredded cheddar, Monterey Jack, or Chihuahua cheese
- Nonstick cooking spray
Nacho Cheese Sauce
- 2 tablespoons butter
- 2 tablespoons flour
- 1 cup whole milk, plus more as needed
- 4 ounces cream cheese
- 1 1/2 cups shredded sharp cheddar
- 2 tablespoons pickled jalapeño juice
- 1/2 teaspoon garlic powder
- 1/2 teaspoon onion powder
- 1/4 teaspoon paprika
- Pinch of cumin
- Salt to taste
- Hot sauce, optional
Optional Toppings
- Shredded lettuce
- Diced tomatoes
- Sour cream
- Pickled jalapeños
- Taco sauce or salsa
Instructions
- In a large skillet, brown the ground beef and diced onion over medium-high heat until the beef is fully cooked. Drain excess grease.
- Add garlic and cook for 30 seconds. Stir in tomato paste, chili powder, paprika, cumin, onion powder, garlic powder, salt, and black pepper. Cook for 1 minute.
- Add Worcestershire sauce, beef broth, and jalapeño juice. Simmer uncovered for 5 to 7 minutes until most of the liquid has reduced.
- Preheat oven to 375°F. Lightly spray a 9 x 13-inch baking dish and arrange crunchy taco shells upright, using a second dish if necessary.
- Place a small pinch of shredded cheese in each shell, divide the beef among the shells, and top with remaining shredded cheese.
- Bake uncovered for 8 to 12 minutes until cheese is melted and shells are heated through.
- Meanwhile, melt butter in a saucepan over medium-low heat. Whisk in flour and cook for 1 minute.
- Gradually whisk in milk and cook until slightly thickened. Reduce heat to low.
- Add cream cheese and whisk until smooth. Gradually add shredded cheddar, stirring until melted. Do not boil.
- Stir in jalapeño juice, garlic powder, onion powder, paprika, cumin, and optional hot sauce. Thin with warm milk as needed.
- Remove tacos from the oven, add desired toppings, and drizzle with warm nacho cheese sauce or serve the sauce on the side.
Notes
- Drain the beef well and allow the broth to reduce to help keep the crunchy shells from becoming soggy.
- For best results, fill and bake the shells immediately before serving.
- Keep the cheese sauce over very low heat and thin with warm milk if necessary.
- Special Equipment: Large skillet, medium saucepan or small soup pot, whisk, 9 x 13-inch baking dish (plus a second dish if needed).