
Sirloin Tip Roast with Onion Gravy

An Affordable Roast Beef Dinner for the Holidays or Sunday Supper
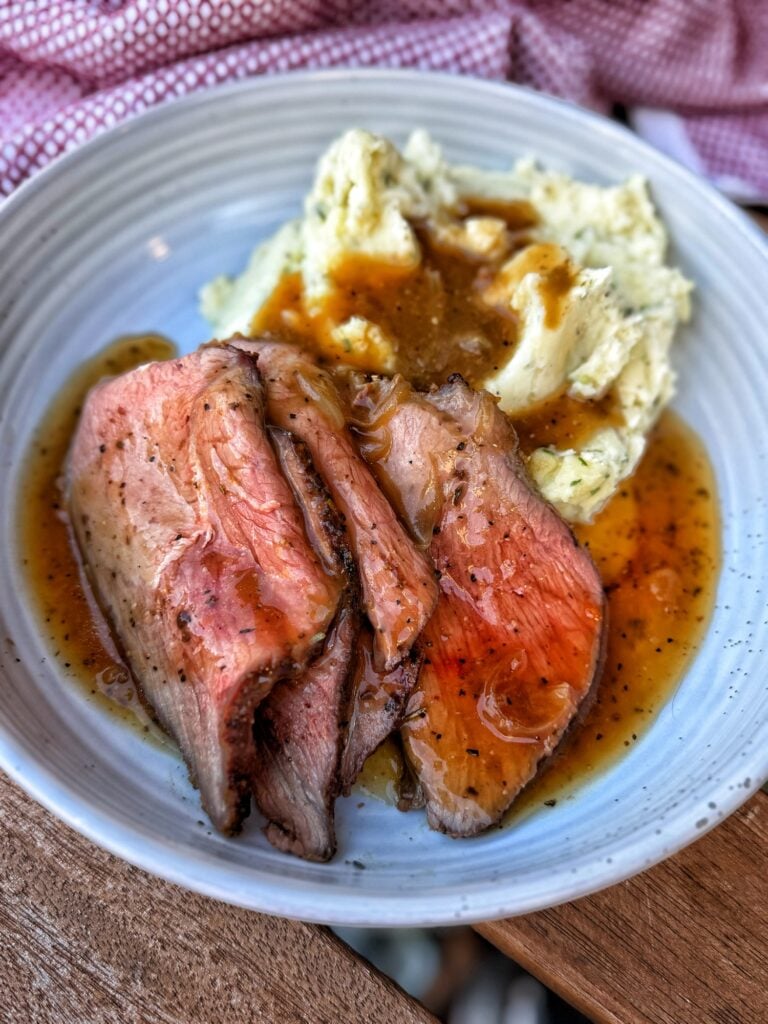
You do not need an expensive cut of beef or a cabinet full of specialty ingredients to put a beautiful roast dinner on the table. This Sirloin Tip Roast with Onion Gravy uses garlic salt, black pepper, dried Italian herbs, and a sweet onion to turn a simple roast into something that feels special enough for a holiday.
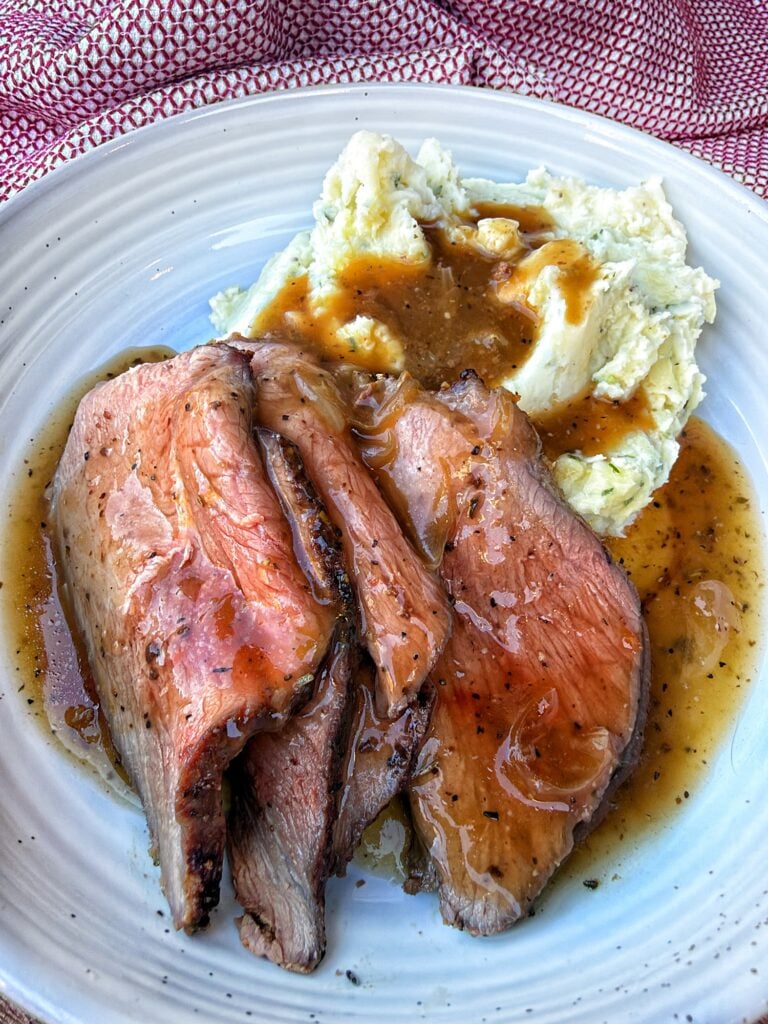
I used a sirloin tip roast from Aldi and served it with my Chive and Mexican Crema Mashed Potatoes. Thin slices of beef, a pile of creamy potatoes, and onion gravy spooned over everything are my kind of holiday dinner. With plenty of sides, a roast this size can stretch to six to eight modest servings. For big meat eaters or planned leftovers, count on fewer servings or buy a larger roast.
For the Sirloin Tip Roast Post
Simple Ingredients for a Special Dinner
- Sirloin tip roast – I used one from Aldi.
- Avocado oil – or another oil suitable for roasting.
- Garlic salt
- Black pepper
- Dried Italian herbs
- One large sweet onion
- Butter
For the Onion Gravy
- Roasting pan drippings and cooked onions
- Water
- Beef or vegetable bouillon – only as needed after tasting
- Cornstarch mixed with cold water
See the recipe card below for measurements and complete instructions.
Before You Jump to the Recipe
- Use a meat thermometer.
- Keep the onions tucked under the beef.
- Slice the rested toast thinly against the grain
Those three things make a big difference with this lean cut. My roast took about an hour, but shape, starting temperature, and your oven can change the timing considerably. Cook by temperature rather than the clock.
What Is a Sirloin Tip Roast?
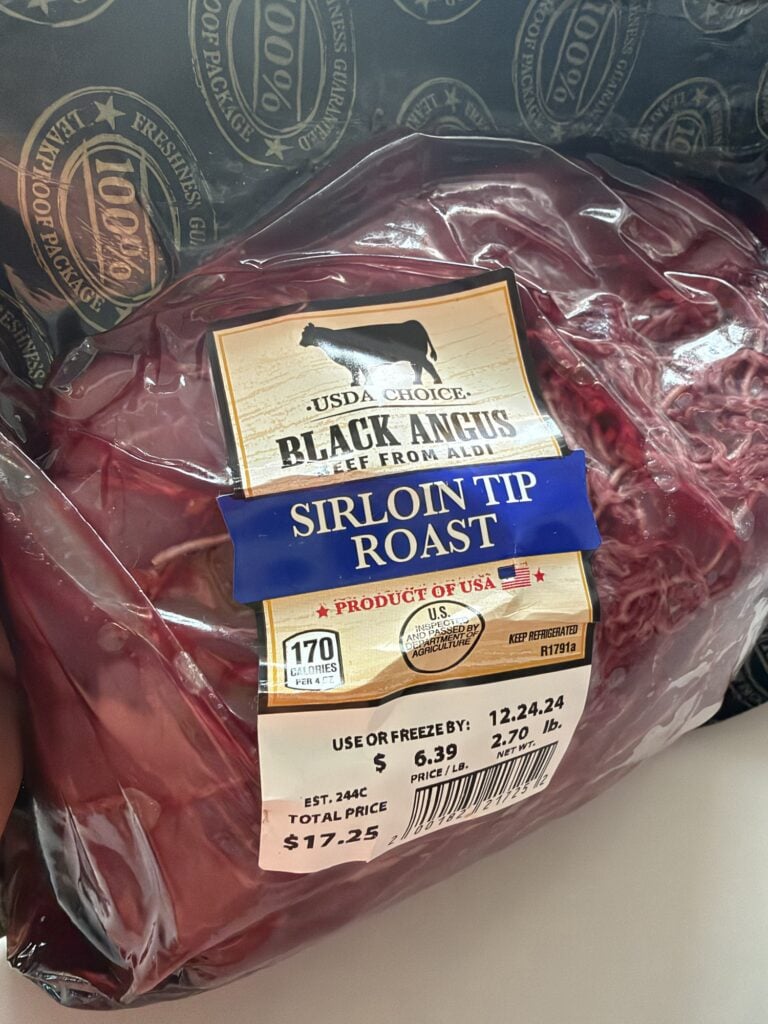
Despite the name, sirloin tip roast comes from the round, near the back leg of the animal, next to the sirloin. It is a lean, economical cut that makes good sliced roast beef when cooked carefully and carved thinly. It is different from a tri-tip or a top sirloin roast, so make sure your package says sirloin tip or round tip roast.
For this recipe, I start with high heat to brown the outside, then turn the oven down to finish more gently. This is a sliced roast beef dinner rather than a fall-apart pot roast. Because the meat is lean, cooking it well-done can make it noticeably firmer and drier.
What Is the Netting For?
The netting helps the roast hold a compact, even shape during cooking. I removed mine so I could work the oil and seasonings over the entire surface. You can leave it on if the package identifies it as oven-safe cooking netting; remove all plastic packaging and absorbent pads either way. If removing the net makes the roast unfold or fall apart, tie it with kitchen twine. Remove any netting or twine before slicing.
Simple Seasonings and Oil Options
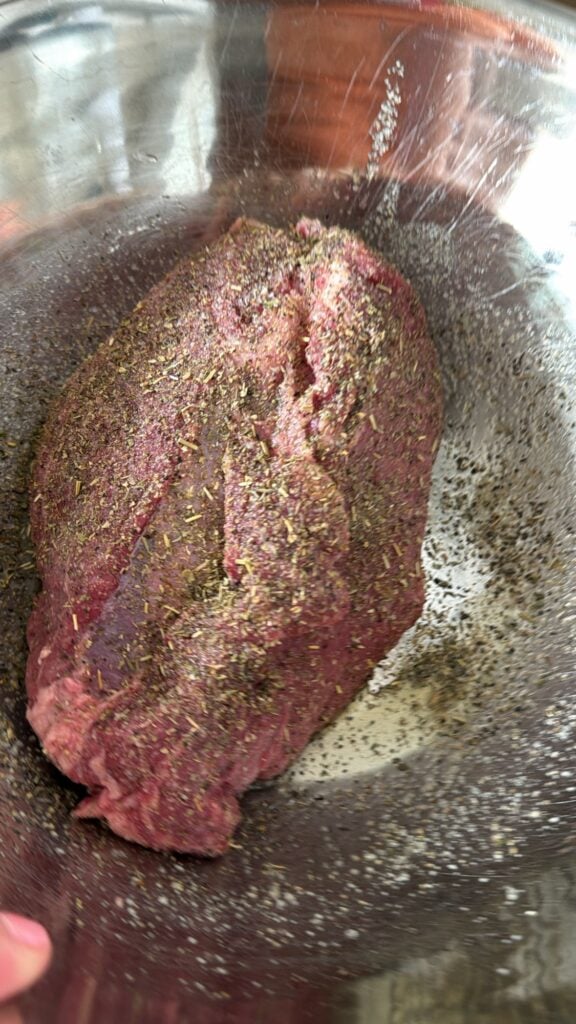
I put the roast in a large bowl, pat it dry, and turn it around as I rub it with avocado oil, garlic salt, black pepper, and dried Italian herbs. Get the sides and ends, too. You want a seasoned outside on every slice, not just seasoning on top.
Avocado oil works well for the hot start. Refined olive oil, canola oil, or vegetable oil are also options. Use just enough to lightly coat the meat. The butter in this recipe goes on the onions rather than serving as the coating on the beef.
Pick a Pan That Fits
I used my black speckled metal roasting pan because I like the crust it gives the beef. Leave the lid off while roasting. Choose the smallest oven-safe pan that comfortably holds the roast without crowding it against the sides. A huge pan lets the juices spread into a thin layer and evaporate before you can use them for gravy.
Pile the sliced sweet onion in the center, making a bed about the size of the roast. Add butter and a little seasoning, then set the beef on top. Tuck stray onion pieces underneath so they do not scorch during the hot start. If the drippings begin to burn later, carefully add a small splash of hot water to the pan. Use only a baking dish rated for 450°F; avoid adding liquid to a hot glass dish.
How Long Does Sirloin Tip Roast Take?
Roast uncovered at 450°F for 15 minutes. Without opening the door, lower the setting to 300°F. A leave-in thermometer is especially helpful because you can watch the internal temperature without repeatedly opening the oven.
For planning, allow roughly 30–40 minutes per pound at the lower temperature after the initial 15-minute hot start, but treat this as a broad estimate for this method, not a promise. A compact roast may take longer than a flatter one. Begin checking a 2½–3-pound roast after about 45 minutes total so an early-finishing roast does not overcook. Mine took about an hour; leave extra time in your dinner plans.
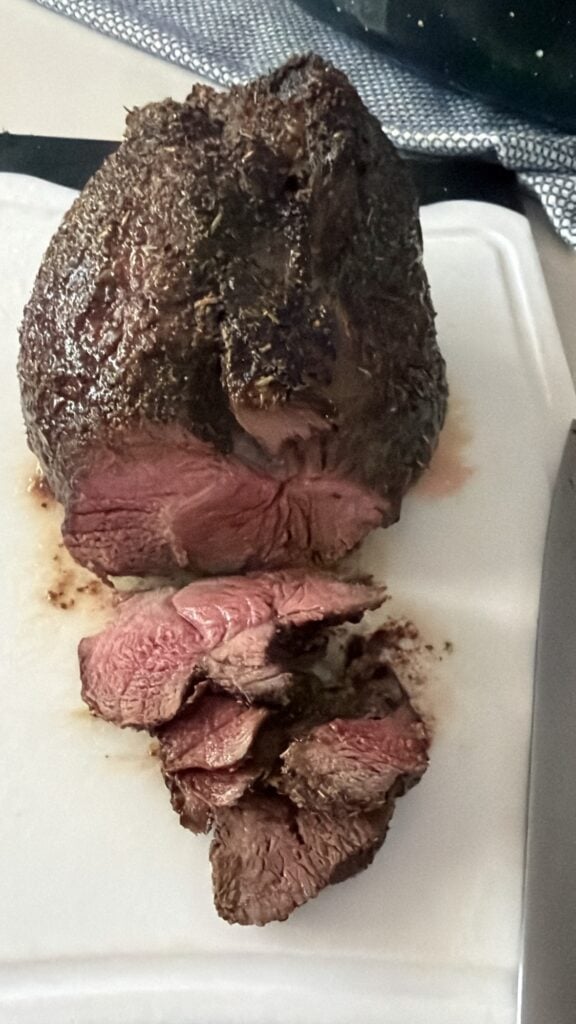
Insert the thermometer into the center of the thickest portion. The temperature can rise another 5–10°F during resting, sometimes more, but a precise 10-degree rise is not guaranteed. A tight lid and a hot roasting pan can increase carryover cooking. I covered mine with the lid; for more control, transfer it to a board and tent it loosely with foil for 15–20 minutes.
Traditional culinary medium-rare is approximately 130–135°F after resting. This is below USDA guidance: cook beef roasts to at least 145°F before removing them from the heat, then rest at least 3 minutes. See the recipe-card temperature notes for the distinction.
Thin Slices Make the Difference
Look for the lines of muscle fibers before you begin carving. Cut across those lines rather than running your knife alongside them. Often this means slicing across the shorter end of the roast, but the direction of the grain matters more than the shape. If the grain changes direction, turn the meat as needed. Aim for slices about 1/8 to 1/4 inch thick.
Turn the Drippings Into Onion Gravy
Transfer the cooked onions, drippings, and any resting juices to a skillet with a tablespoon of butter. Add three cups of water and bring it to a gentle simmer, scraping up the flavorful browned bits. Leave behind black, burned bits, which can make the gravy bitter.
Taste the diluted drippings before adding bouillon. The roast seasonings may already provide enough salt. I used about a heaping tablespoon of Better Than Bouillon vegetable base because I wanted a larger batch of gravy and mine needed more flavor. Beef base works, too. Start with a teaspoon, taste, and add more only as needed; bouillon brands and drippings vary in saltiness.
For a slightly thicker au jus, stir two teaspoons of cornstarch into two tablespoons of cold water until completely smooth. Whisk that slurry into the simmering gravy a little at a time. Simmer a minute or two to develop the thickness. This makes a lightly thickened sauce, not a heavy gravy. For more body, make another small slurry and add it gradually. Never sprinkle dry cornstarch directly into the skillet.
Sunday Dinner and Sandwiches Tomorrow
Serve the thinly sliced beef with the onion gravy and Chive and Mexican Crema Mashed Potatoes. Add a green vegetable, a salad, and some rolls, and you have a holiday-worthy meal made from everyday ingredients.
I also sliced the remaining beef and warmed it in the gravy. For refrigerated leftovers, reheat to 165°F; the beef will cook further and lose some pinkness. Thin cold slices are wonderful for sandwiches with horseradish sauce or mustard. Refrigerate beef and gravy within two hours and use within three to four days, or freeze for longer storage.
Frequently Asked Questions
Can I use a larger roast? Yes. Scale the seasoning to coat it and allow extra time. Use the thermometer rather than multiplying the cooking time exactly. A larger roast may also have more carryover heat.
Do I add water before roasting? Not initially. The onion and beef provide moisture. Add a small splash of hot water if needed to prevent scorching, without pouring it over the crust.
Can I cook it covered? Roast uncovered for the browned exterior shown here. A covered, liquid-filled pot produces a different result.
Why is my roast tough? Thick slices, slicing with the grain, or overcooking can make this lean cut seem tougher. Slice thinly across the grain and serve with gravy.
Temperature Notes
These are approximate culinary descriptions of the temperature after resting, not USDA safe cooking minimums:
| Doneness | Approximate finished temperature |
|---|---|
| Rare | 125°F |
| Medium-rare | 130–135°F |
| Medium | 140–145°F |
| Medium-well | 150–155°F |
| Well-done | 160°F or higher |
For culinary doneness, cooks often remove a roast roughly 5–10°F below the desired finish, then monitor it during resting. Carryover is variable; do not assume an exact 10°F increase. Rare and medium-rare targets in this table fall below USDA recommendations. USDA recommends reaching 145°F before removing a beef roast from the heat and resting at least 3 minutes. If labeled mechanically tenderized or injected, follow the package’s validated cooking instructions. Well-done sirloin tip will be considerably firmer.
Storage
Refrigerate within two hours. Use refrigerated leftovers within 3–4 days; reheat to 165°F. Slice thinly for cold sandwiches or reheat in gravy, understanding that reheating will cook the beef further.
More Beef Dinners for a Special Occasion
This sirloin tip roast is a great way to serve a special dinner while keeping the grocery budget in check. If you have a little more room in the budget, beef tenderloin and prime rib make beautiful holiday centerpieces, too.
Tenderloin is known for its tenderness, while prime rib brings that rich beef flavor and beautiful marbling. Brisket is another wonderful option for feeding a gathering, especially when you want something you can cook slowly until tender. It is not always more expensive per pound, but a larger brisket can be a bigger purchase. Each cut needs its own cooking method, so check out the recipes below for more special dinner ideas, then click the image underneath for the recipe.
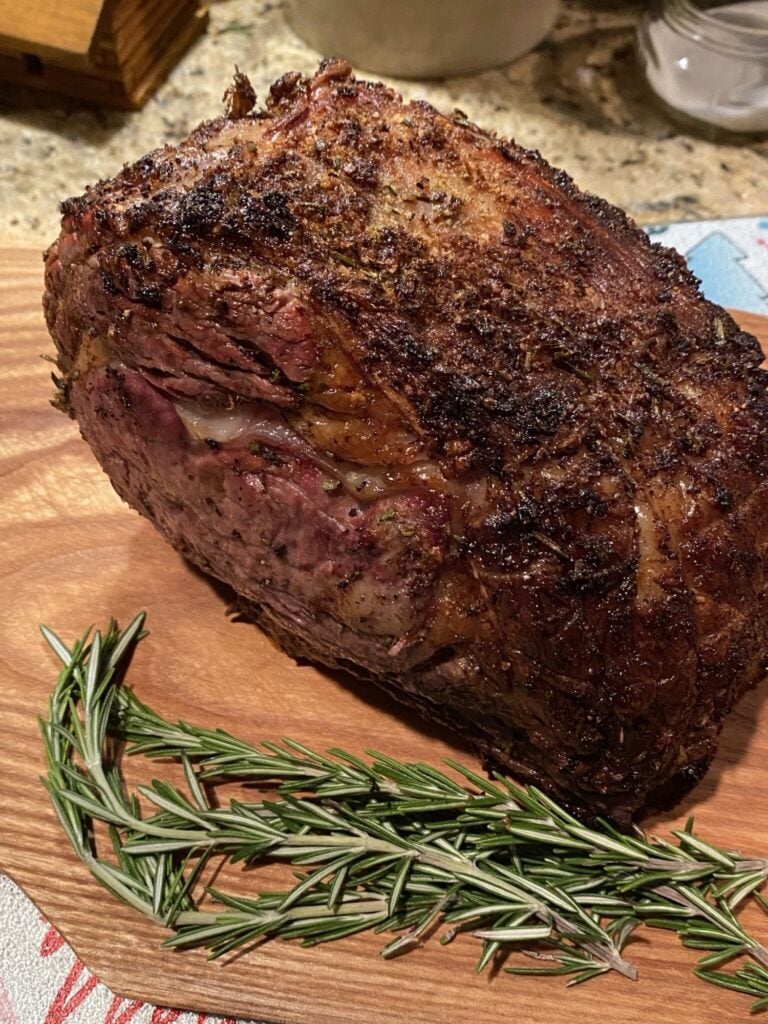
Prime Rib
A classic holiday roast with rich flavor that makes dinner feel like an occasion.
Beef Brisket
Slow-cooked comfort food that is perfect for gathering everyone around the table.
Beef Tenderloin
A tender, elegant centerpiece for a holiday dinner or special celebration.
Sirloin Tip Roast with Onion Gravy
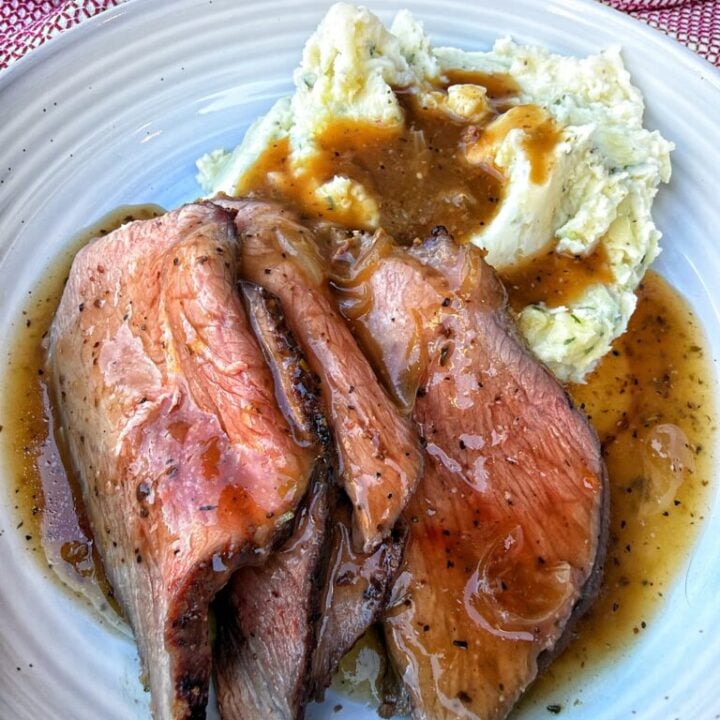
Simply seasoned sirloin tip roast cooked over sweet onions, thinly sliced, and served with a lightly thickened pan gravy. An affordable holiday main dish or Sunday dinner with sandwich possibilities for the leftovers.
Ingredients
Roast
- 1 sirloin tip roast, approximately 2.7–3 pounds, fully thawed in the refrigerator
- 1–2 tablespoons avocado oil, or another suitable roasting oil
- 2 teaspoons garlic salt, approximately, adjusted to taste and brand
- 1 teaspoon black pepper, or to taste
- 2 teaspoons dried Italian herbs
- 1 large sweet onion, thickly sliced
- 1 tablespoon butter
- Small additional pinches garlic salt, pepper, and Italian herbs for the onions
Onion Gravy
- Cooked onions and usable drippings from the roast
- 1 tablespoon butter
- 3 cups water
- Better Than Bouillon vegetable or beef base, to taste: begin with 1 teaspoon and add only as needed, up to approximately 1 heaping tablespoon
- 2 teaspoons cornstarch
- 2 tablespoons cold water
- Additional cornstarch slurry, only if desired
Instructions
- Heat the oven to 450°F. Take the fully thawed roast from the refrigerator while you prepare the ingredients, about 30–45 minutes. It does not need to reach room temperature throughout. Keep total time at room temperature under two hours, or one hour if the room is above 90°F.
- Remove packaging and the netting, if desired. Only leave netting on if confirmed oven-safe. Tie with kitchen twine if needed to hold the roast together. Pat dry with paper towels; do not rinse.
- Place the roast in a large bowl. Rub all over with oil, garlic salt, pepper, and Italian herbs, turning to coat every surface. Quantities are starting estimates for the season-to-coat method; adjust for roast size and your seasoning brand.
- Make a compact bed of onions in a snug-fitting, oven-safe metal roasting pan. Top with 1 tablespoon butter and pinches of seasoning. Place the beef on the onions and tuck exposed onion pieces underneath.
- Roast uncovered for 15 minutes at 450°F. Without opening the oven door, turn the setting down to 300°F. Continue roasting to your chosen internal temperature, using a probe or checking with an instant-read thermometer in the thickest center.
- Begin checking after about 45 minutes total. For planning only, allow approximately 30–40 minutes per pound at 300°F after the hot start; actual time can vary substantially. The author's roast took about an hour. Use the temperature notes below rather than the clock.
- Transfer the roast to a board and loosely tent with foil for 15–20 minutes. The author rested it covered in the roasting pan; that can produce more carryover cooking. Remove any twine or netting before carving.
- Meanwhile, transfer onions, unburned drippings, and resting juices to a skillet. Add 1 tablespoon butter and 3 cups water. Bring to a gentle simmer. Taste before adding bouillon; add it a teaspoon at a time until the flavor is right. You may need little or none.
- Stir 2 teaspoons cornstarch with 2 tablespoons cold water until smooth. Stir again immediately before using. Slowly whisk into the simmering liquid. Simmer 1–2 minutes, stirring, until lightly thickened. Add a second small slurry only if you want thicker gravy.
- Slice the rested beef thinly against the grain, about ?–¼ inch thick. Serve with the onions and gravy.