
Stuffed Shells

Creamy, Cheesy Stuffed Shells Made With Cottage Cheese
These Stuffed Shells are one of those dinners that takes a little extra time in the kitchen, but the results are absolutely worth it.

Jumbo pasta shells are filled with a creamy mixture of cottage cheese, Parmesan, mozzarella, fresh parsley and seasonings. They’re nestled into marinara sauce, covered with even MORE cheese and baked until everything is hot, bubbly and delicious.
My little secret is using cottage cheese instead of ricotta.
I find that cottage cheese keeps the filling extra creamy and prevents the shells from drying out while they bake.
This is one of my favorite recipes to make when I’m feeding a crowd, bringing dinner to someone or stocking the freezer with meals for another day.
I usually make several trays at once because if I’m going through the trouble of stuffing all those shells, I might as well get a few dinners out of it.
And don’t worry about making homemade sauce.
Use any marinara sauce you love.
Before You Jump to the Recipe
Here are the most important things to know before making these Stuffed Shells.
- I prefer cottage cheese instead of ricotta. It makes the filling extra creamy and helps prevent dryness.
- Small curd cottage cheese is my favorite. It creates a more uniform filling.
- Large curd cottage cheese works too. You can mash it slightly if you want a smoother consistency.
- You can substitute ricotta. I’ve also made these using half ricotta and half cottage cheese.
- Use jumbo pasta shells. These are the large shells specifically made for stuffing.
- Cook the shells just until al dente. They will continue cooking in the oven.
- Make extra shells. Some will inevitably tear while cooking or stuffing.
- Let the pasta cool before filling. Nobody wants to burn their fingers stuffing hot pasta.
- Use your favorite marinara. Homemade or jarred sauce both work.
- Don’t skimp on sauce. It keeps the pasta moist during baking.
- The eggs help hold the cheese filling together.
- Fresh parsley adds flavor and freshness.
- You can add cooked spinach or meat.
- This recipe makes approximately two trays, depending on how many shells you fill and the size of your baking dishes.
- You can freeze the shells before baking.
- You can bake them directly from frozen. Just allow additional covered baking time.
- You can also bake them ahead and freeze leftovers.
- Disposable aluminum pans are great for sharing and freezing.
- Let the finished shells rest for a few minutes before serving.
A Labor of Love That’s Worth the Effort
Most of the recipes I share are pretty easy.
I like meals that don’t require spending an entire afternoon in the kitchen.
But every once in a while, I make something that takes a little more time.
These Stuffed Shells are one of those recipes.
I only make them a few times a year, and when I announce that I’m making them, everyone gets excited.
It’s become a little event.
Stuffed Shells Day.
And when I’m making them, I usually make A LOT.
Because why make one tray when you can make five? My family looks forward to each getting a tray of these.

The Perfect Dinner to Share
One of the reasons I love this recipe is that it makes a wonderful meal to bring someone.
When my cousin had her first baby, she specifically requested these Stuffed Shells.
And of course, once the rest of the family heard I was making them, everyone wanted a tray.
I ended up tripling the recipe.
I made trays for three cousins, another for one of Mr. Tipsy’s friends, and still had enough for us.
That’s the beauty of a recipe like this.
You can spend one afternoon cooking and have several meals ready for yourself and the people you love.
And because these freeze so well, nobody has to eat their entire tray immediately.
Why I Use Cottage Cheese Instead of Ricotta
This is probably the most important thing I want you to understand about my Stuffed Shells recipe.
I prefer cottage cheese because it helps keep the filling moist and creamy while the shells bake.
Ricotta is the more traditional cheese used in many stuffed shell recipes.
Do not get me wrong, I love ricotta.
But over the years, I’ve found that I prefer the texture of cottage cheese.
Cottage cheese generally contains more free moisture than a dense ricotta, which helps the filling stay soft during baking.
This is especially useful because my shells spend approximately an hour in the oven.
I don’t want dry, crumbly cheese filling.
I want creamy cheese surrounded by tender pasta, marinara and melted mozzarella. You will definitely get this from cottage cheese.
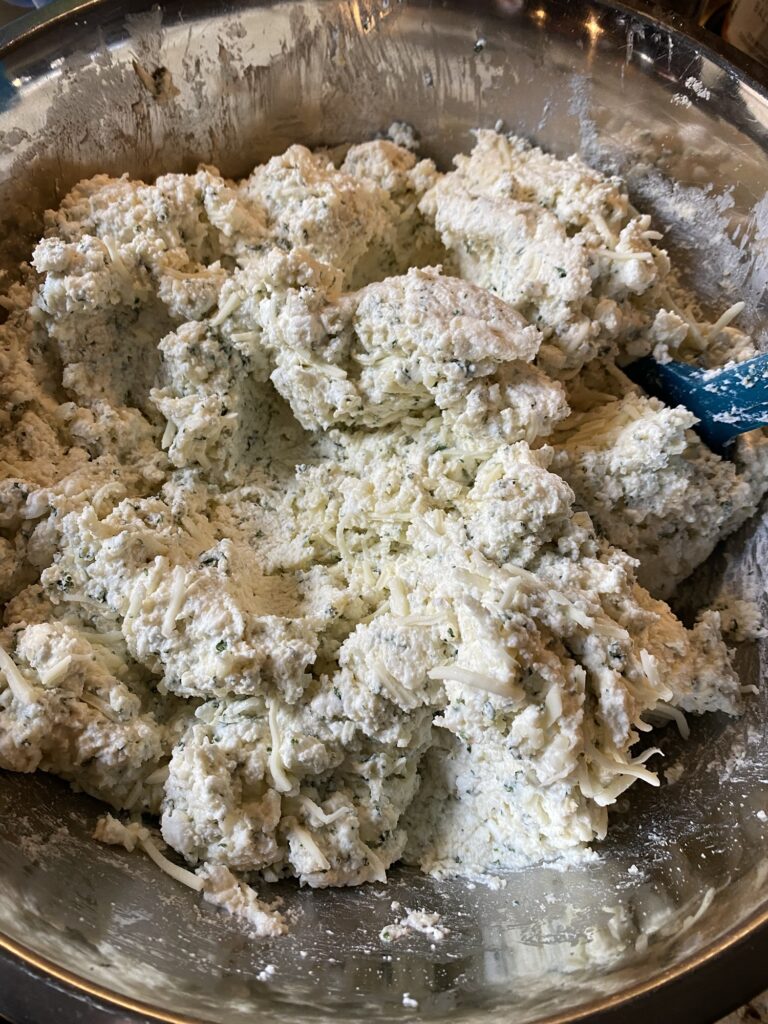
Cottage Cheese Makes the Filling Creamier
When you combine cottage cheese with Parmesan, shredded mozzarella and eggs, you get a rich filling that holds together while staying tender.
The cottage cheese contributes moisture.
The mozzarella adds that melty cheese texture.
The Parmesan adds a savory, salty flavor.
And the eggs help everything set while the shells bake.
It’s a very simple combination.
But it works beautifully.
And before anyone tells me that their Italian grandmother would NEVER use cottage cheese in stuffed shells, that’s perfectly fine.
This is how I make mine.
Your grandmother can make hers however she likes. I bet even Grandma would enjoy the savings.
Small Curd or Large Curd Cottage Cheese?
You can use either.
But I prefer small curd cottage cheese.
Here’s why.
Small curd cottage cheese has smaller pieces of cheese suspended in the creamy dressing.
When you mix it with the mozzarella, Parmesan, eggs and seasonings, the filling becomes more uniform.
It also makes the shells easier to fill.
Large curd cottage cheese has bigger pieces of cheese.
It works perfectly well, but the filling will have a slightly chunkier texture.
Neither is wrong.
It’s simply a matter of preference.
How to Use Large Curd Cottage Cheese
If large curd is what you have in your refrigerator, use it.
You don’t need to make a special trip to the grocery store.
If you want a smoother filling, you can mash the cottage cheese with a fork or pulse it briefly in a food processor.
I wouldn’t blend it into a completely smooth liquid.
You still want a thick filling that can be spooned into the shells.
If your cottage cheese has an unusually large amount of watery liquid, you can drain off a little of the excess.
But don’t drain it until it’s dry.
The moisture is part of why I use cottage cheese in the first place.
Can I Use Ricotta Instead?
Absolutely.
The original recipe is very flexible.
You can use:
- All cottage cheese
- Half cottage cheese and half ricotta
- All ricotta
I sometimes make the filling using half ricotta and half cottage cheese.
That’s a nice compromise if you like the traditional ricotta texture but want some of the extra moisture from cottage cheese.
If you use all ricotta, the filling may be slightly denser.
You can loosen an especially thick ricotta filling with a small splash of milk if needed.
Use Jumbo Pasta Shells
You need the large pasta shells made specifically for stuffing.
These are usually labeled jumbo shells.
They’re much larger than the medium or small shells you would use in macaroni and cheese or pasta salad.
You should be able to spoon a generous amount of filling into each shell.
There have been people reporting that the jumbo shells have been hard to find. I will say that I always find them at Walmart. If your store has Barilla brand pasta, that means they can order from Barilla and order the jumbo shells. You can ask a manager to do this for you. It may just be that no one has asked for them.
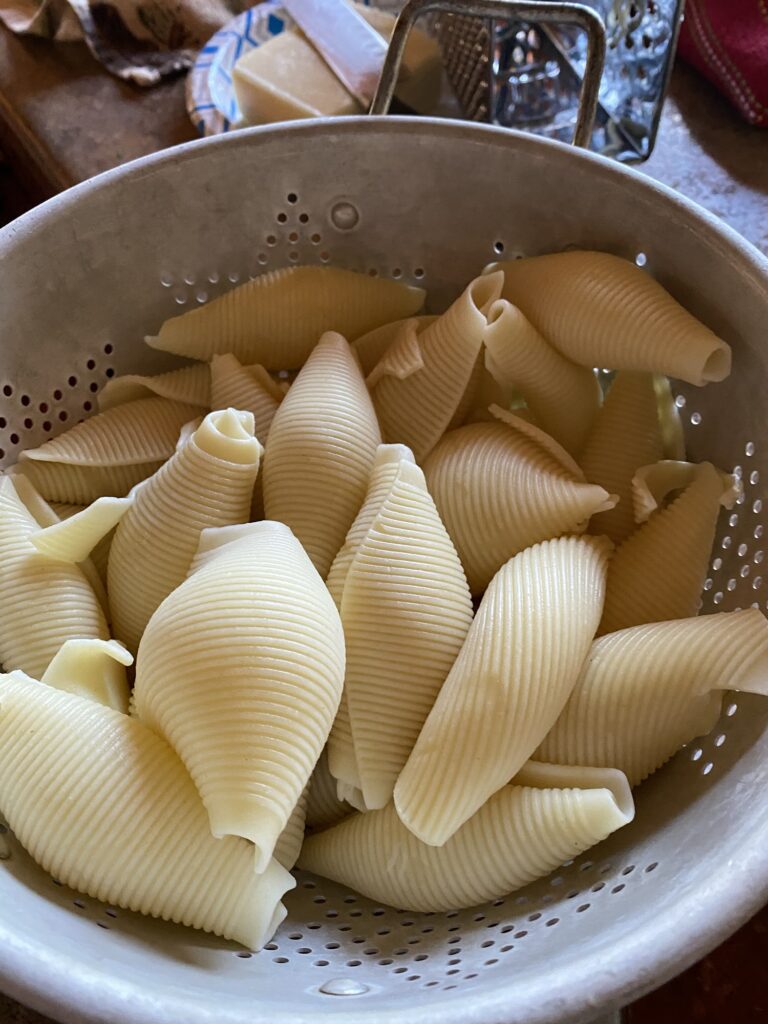
Don’t Overcook the Pasta
This is important.
The shells are going to bake in marinara sauce for approximately an hour.
You don’t want them completely soft before they even go into the oven.
Cook them until al dente, according to the package directions.
They should be flexible enough to open and stuff without cracking, but still have a little firmness.
Drain and rinse them with cool water to stop the cooking.
Then let them cool enough to handle.
Cook a Few Extra Shells
If you’ve ever made stuffed shells, you already know why I’m telling you this.
Some shells will tear.
Some will stick together.
Some will mysteriously disappear because someone decides to eat them while you’re cooking.
Cook a few extras.
That way you don’t end up with a bowl of cheese filling and nowhere to put it.
The Cheese Filling
The filling is very simple.
You need:
- Cottage cheese
- Powdered-style Parmesan cheese
- Shredded mozzarella
- Fresh parsley
- Salt and pepper
- Eggs
That’s it.
Mix the cheeses, parsley and seasonings together first.
Then fold in the whisked eggs.
The filling should be thick enough to spoon into the shells.
Why I Use Powdered Parmesan
I use the finely grated, powdered-style Parmesan cheese for this recipe.
It mixes evenly throughout the cottage cheese filling.
It also adds savory flavor without creating large pieces of cheese.
Freshly grated Parmesan can work, but the finely grated style is what I use in the original recipe.
Fresh Parsley Makes a Difference
The original recipe uses three tablespoons of fresh minced parsley.
I love the freshness it adds to all that rich cheese.
If you don’t have fresh parsley, you can use a smaller amount of dried parsley.
Dried herbs are more concentrated, so start with approximately one tablespoon.
You can also add a little Italian seasoning if you like.
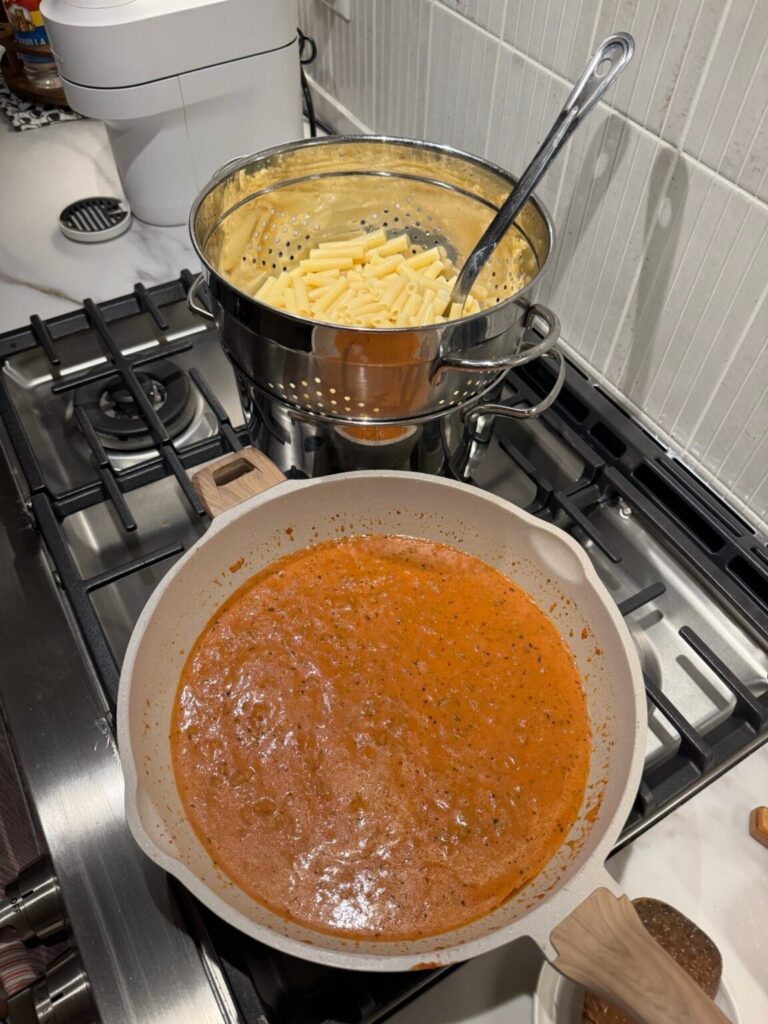
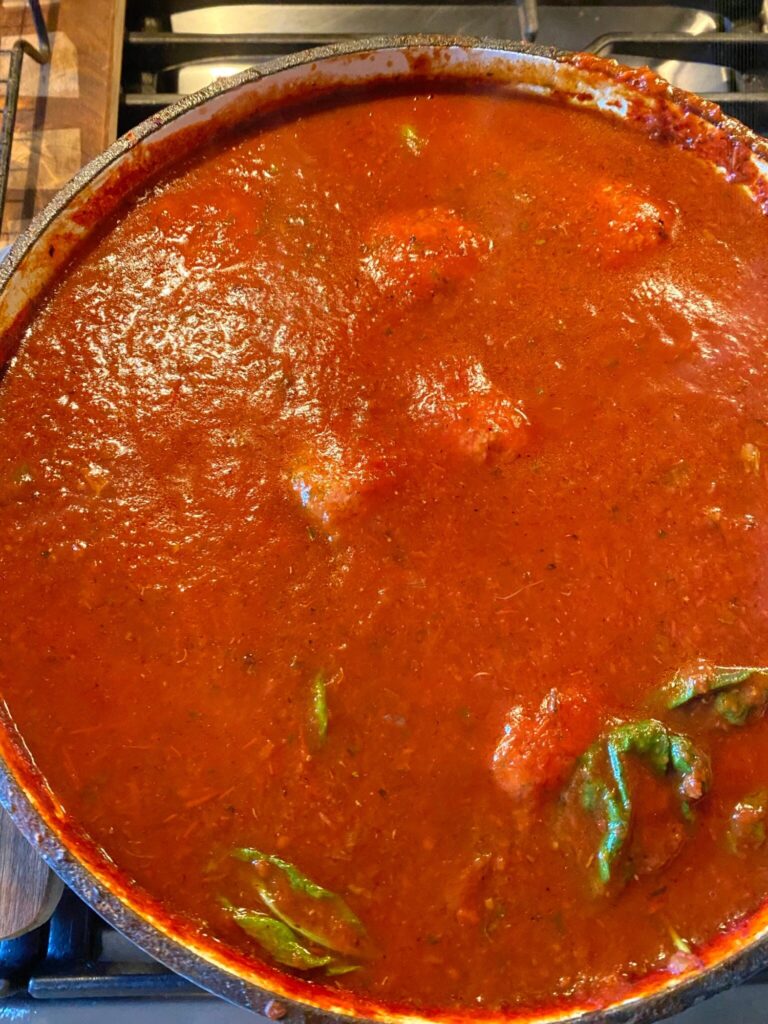
Use Whatever Marinara Sauce You Love
This is another place where I want to make your life easy.
You do NOT have to make homemade marinara sauce to make these Stuffed Shells.
I frequently make my own sauces, but I also use jarred marinara when I want to save time.
Use whichever marinara you and your family enjoy.
A basic tomato basil marinara works beautifully.
A garlic marinara is delicious.
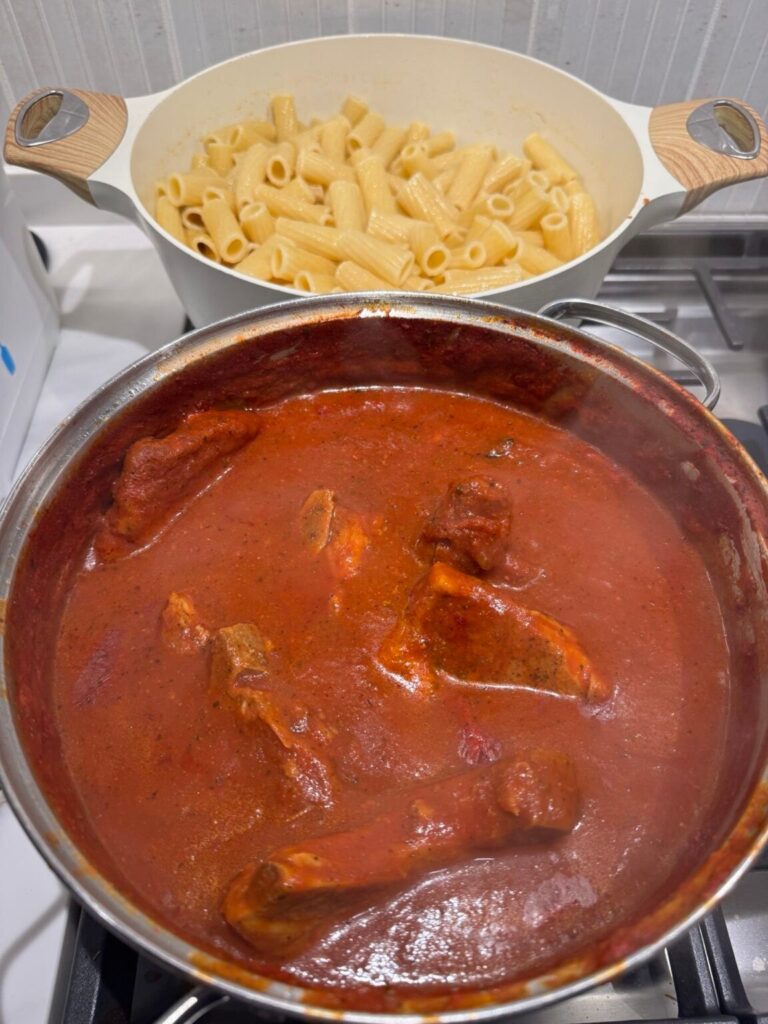
A homemade Sunday sauce is wonderful.
You can even use a meat sauce if you want a heartier version.
The cheese filling is the star of this recipe, so the sauce is really up to you.
How Much Sauce Do You Need?
The original recipe uses approximately four cups of sauce.
You want enough sauce to cover the bottom of the baking dish and surround the shells.
I start with approximately one and a half cups in the bottom of a 9 x 13-inch pan.
Then I add more sauce over the filled shells before baking.
Toward the end of baking, I add more sauce along with the remaining mozzarella.
If you’re using two smaller trays, divide the sauce between them.
The exact amount may vary depending on how many shells you have and how large your pans are.
The important thing is making sure the shells have enough sauce to stay moist.
My Favorite Sauces for Stuffed Shells
How to Stuff the Shells
Once the shells are cooked and cooled, filling them is pretty straightforward.
I use a tablespoon.
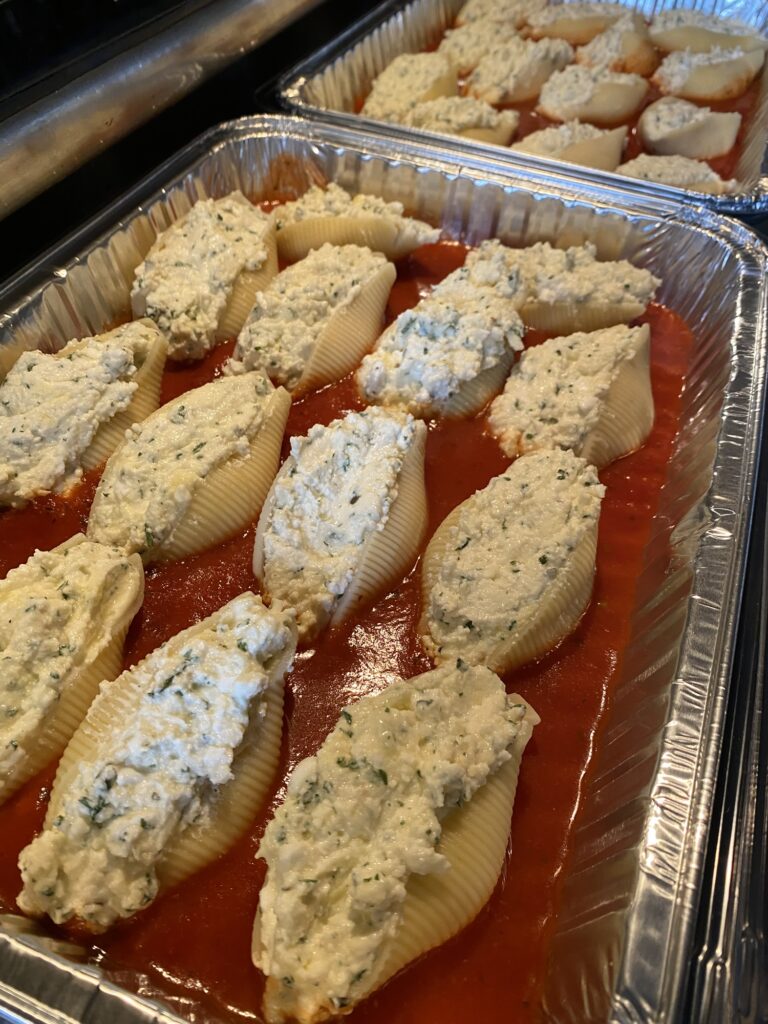
Open each shell gently and spoon in a generous amount of the cottage cheese mixture.
You want them nice and full.
But don’t pack them so tightly that the shells tear.
Arrange the filled shells in the baking dish on top of the marinara sauce.
Repeat until you’ve used the filling up.
Add Plenty of Mozzarella
The filling already contains mozzarella.
But we’re adding MORE mozzarella over the top.
Because this is stuffed shells.
Not a salad.
I add approximately one cup of mozzarella before the first baking period.
Then I add the remaining cheese toward the end.
This gives the shells plenty of melted cheese without leaving the entire topping in the oven for the full hour.
How to Bake the Stuffed Shells
Preheat your oven to 375°F.
Place the filled shells into the sauce-lined baking dish.
Spoon more sauce over the top and sprinkle with approximately one cup of mozzarella.
Bake for approximately 45 minutes.
Then add more sauce and the remaining mozzarella.
Increase the oven temperature to 400°F and bake approximately 15 more minutes.
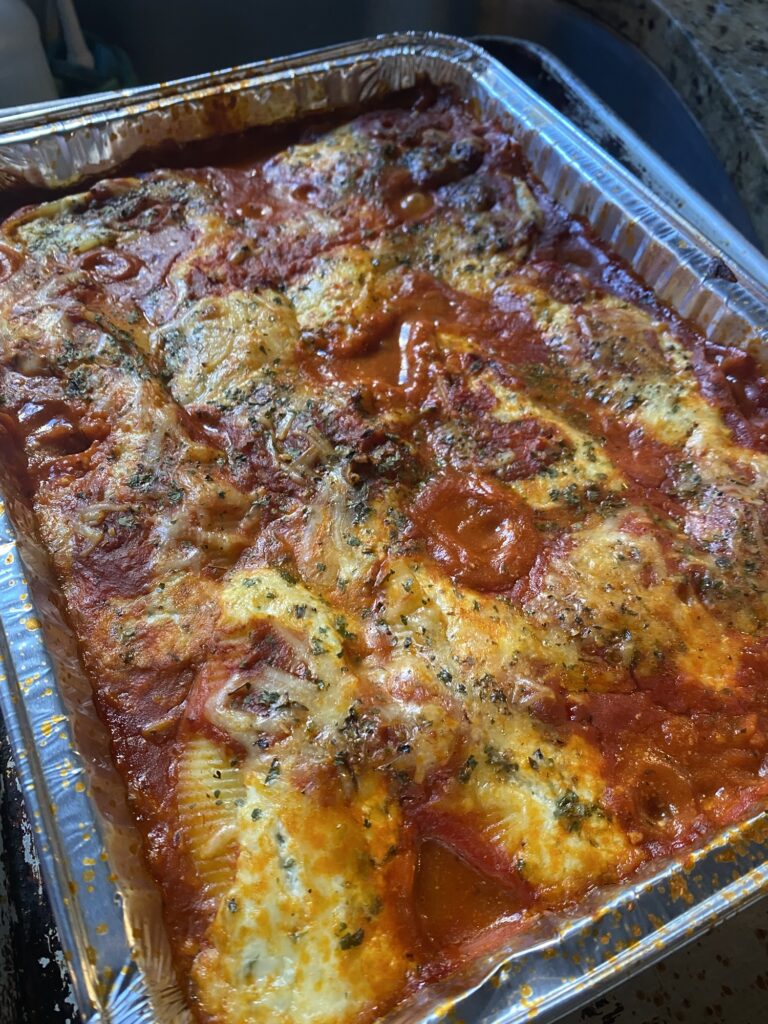
I like finishing them briefly under the broiler to get those beautiful bubbly, browned spots on the cheese.
Watch carefully.
The broiler can go from perfectly golden to burned very quickly.
The center should be thoroughly heated to 165°F.
How to Add Spinach to Stuffed Shells
Spinach is one of the easiest additions you can make to this recipe.
And it’s delicious with the cottage cheese filling.
You can use fresh or frozen spinach.
Using Fresh Spinach
Start with approximately five ounces of fresh baby spinach.
Cook it briefly in a skillet until wilted.
Let it cool.
Then squeeze out the excess moisture and chop it finely.
Fold the spinach into the prepared cheese mixture before stuffing the shells.
Using Frozen Spinach
Use approximately one 10-ounce package of frozen chopped spinach.
Thaw it completely.
Then squeeze out as much liquid as possible.
I like putting the spinach into a clean kitchen towel and squeezing it over the sink.
You will be amazed how much water comes out.
Once the spinach is well drained, fold it into the cheese mixture.
Why You Need to Drain the Spinach
Remember how I said I use cottage cheese because I like the moisture?
Well, there is a difference between a creamy filling and a watery filling.
Spinach releases a LOT of liquid.
If you don’t squeeze it out, you can end up with watery cheese filling and extra liquid in the bottom of your baking dish.
We want creamy, not a swamp.
How to Add Meat to Stuffed Shells
You can also make these into a heartier dinner by adding meat.
There are a couple of ways I would do this.
Add Italian Sausage
Brown approximately half a pound of mild or hot Italian sausage.
Break it into small crumbles as it cooks.
Drain excess grease and let the sausage cool.
Then fold it into the cheese mixture before stuffing the shells.
The sausage adds a lot of flavor and makes the filling more substantial.
Add Ground Beef
You can do the same thing with approximately half a pound of ground beef.
Brown it completely, breaking it into small crumbles.
Season it with salt, pepper, garlic powder and Italian seasoning.
Drain the grease and let it cool before folding it into the cheese filling.
Add Ground Chicken
Ground chicken also works.
Cook it thoroughly to 165°F, season it well and let it cool before mixing it with the cheese.
This is a good option if you want something a little different from traditional beef or sausage.
Use Meat Sauce Instead
This is probably the EASIEST option.
Keep the original cottage cheese filling exactly as written.
Then use a meat sauce instead of plain marinara.
You get all the flavor of the meat without having to change the cheese filling.
This is especially convenient if you already have leftover spaghetti sauce in the refrigerator or freezer.
Can You Add Spinach AND Meat?
Absolutely.
You could add spinach and cooked Italian sausage to the filling.
Or use spinach in the filling and meat sauce in the baking dish.
Just remember that additional ingredients increase the volume of the filling.
You may need to cook extra shells or use another small baking dish.
Make These Ahead of Time
These Stuffed Shells are a wonderful make-ahead dinner.
You can prepare the entire dish earlier in the day.
Cook the shells.
Make the filling.
Stuff the shells.
Arrange them in the sauce.
Cover and refrigerate.
When you’re ready for dinner, take the dish out of the refrigerator while the oven preheats.
If you’re using a glass baking dish, follow the manufacturer’s temperature-change instructions.
Bake until the shells are hot throughout and the center reaches 165°F.
You may need a little additional baking time because the ingredients are starting cold.
How to Freeze Stuffed Shells Before Baking
This is one of my favorite things about this recipe.
You can make several trays, freeze them and have homemade dinners ready for another day.
Here’s how I recommend doing it.
- Cook the jumbo shells until al dente.
- Drain, rinse and cool the pasta.
- Prepare the cottage cheese filling.
- Spoon marinara sauce into the bottom of a freezer-safe baking dish.
- Stuff the shells and arrange them in the sauce.
- Spoon additional marinara over the shells.
- Add the first layer of mozzarella, or reserve the topping cheese to add when baking.
- Cover the pan tightly with a layer of plastic wrap followed by foil, or use a freezer-safe airtight lid.
- Label the container with the recipe name, date and baking instructions.
- Freeze promptly.
I especially like using disposable aluminum baking pans.
They’re easy to stack, easy to share and nobody has to worry about returning a casserole dish.
For the best quality, I recommend using the frozen shells within approximately two to three months.
How to Thaw Frozen Stuffed Shells
My preferred method is thawing them overnight in the refrigerator.
Remove the tray from the freezer and place it in the refrigerator approximately 24 hours before baking.
A large or very full tray may need longer.
Keep the dish covered while it thaws.
Once thawed, remove any plastic wrap, cover with foil and bake at 375°F until heated through.
I recommend keeping the shells covered for the first part of baking so the pasta doesn’t dry out.
Then uncover, add the remaining sauce and mozzarella, and finish baking until bubbly.
The center should reach 165°F.
How to Bake Stuffed Shells Directly From Frozen
YES, you can bake these without thawing them first.
This is especially convenient when you forget to move dinner from the freezer to the refrigerator.
And I forget things like that all the time.
For a standard freezer-safe metal or foil baking pan:
- Preheat the oven to 375°F.
- Remove all plastic wrap and any non-oven-safe lid.
- Make sure the frozen shells have enough marinara sauce around them. Add a little extra if necessary.
- Cover the pan tightly with aluminum foil.
- Place the frozen pan in the oven.
- Bake covered for approximately 60 to 75 minutes as a starting point.
- Carefully check the center. A large, densely packed pan may need additional time.
- Once the shells are mostly heated through, remove the foil.
- Add additional marinara and the remaining mozzarella.
- Continue baking uncovered until the cheese is melted, the sauce is bubbling and the center reaches 165°F.
The total baking time may be approximately 75 to 100 minutes or longer, depending on the size and depth of your pan.
Use the internal temperature rather than relying only on the clock.
I would NOT put a frozen glass casserole dish directly into a hot oven unless the manufacturer specifically says it is safe.
A disposable aluminum pan is a much easier choice for baking directly from frozen.
Should You Freeze Stuffed Shells Before or After Baking?
You can do either.
But if I’m making a big batch specifically for the freezer, I prefer freezing them before baking.
That way, when I finally cook them, I get the experience of freshly baked Stuffed Shells.
The pasta hasn’t already gone through an entire baking cycle.
And the cheese topping gets freshly melted and bubbly.
If you have leftovers from a baked tray, those can be frozen too.
How to Freeze Already Baked Stuffed Shells
Let the cooked shells cool promptly.
Divide them into smaller freezer-safe containers.
Add a little extra marinara to keep them moist.
Seal tightly and freeze.
When you’re ready to eat, thaw overnight in the refrigerator or reheat directly from frozen in an oven-safe covered dish.
Reheat to 165°F.
If the pasta looks dry, add a little extra sauce before reheating.
Why I Like Freezing Smaller Portions
If you’re cooking for one or two people, you don’t necessarily want an entire 9 x 13 pan of stuffed shells every time.
You can divide the recipe into smaller foil pans.
Maybe one tray for dinner tonight.
One for next week.
One to bring to a friend.
And another for the freezer.
This is also a great idea for empty nesters or anyone who likes homemade dinners without cooking every single night.
Bringing Stuffed Shells to Someone
This is one of my favorite meals to bring to someone who needs a little help.
A new baby.
A family dealing with illness.
Someone recovering from surgery.
Or just a friend who has had a really difficult week.
Make a tray of stuffed shells in a disposable foil pan.
Include some extra marinara and a bag of shredded mozzarella if you’re giving them an unbaked frozen tray.
Write the baking instructions right on the foil.
Then they can make dinner whenever it’s convenient.
Sometimes the best thing you can give someone is a meal they don’t have to think about.
What to Serve With Stuffed Shells
I keep the sides simple.
This is already a rich, filling pasta dinner.
My favorite things to serve with Stuffed Shells are:
- Garlic bread
- A big green salad
- Caesar salad
- Roasted green beans
- Steamed broccoli
- Roasted asparagus
- Italian bread
- A simple tomato salad
But really a salad and some garlic bread are all you really need.
Leftovers Are Delicious
One of the things I love about this recipe is how well the leftovers reheat.
Sometimes I think the shells taste even better the next day because the pasta has had more time to absorb the sauce.
Store leftovers in a covered container in the refrigerator.
Use within three to four days.
Reheat with a little extra marinara until hot throughout, reaching 165°F.
More Easy Pasta Dinners
See Below The Recipe Card For Frequently Asked Questions
Stuffed Shells Recipe

Creamy, cheesy Stuffed Shells made with cottage cheese, Parmesan, mozzarella and fresh parsley, baked in your favorite marinara sauce. This recipe makes enough for sharing and freezes beautifully before or after baking.
Ingredients
- 4 cups cottage cheese, preferably small curd
- 1 cup powdered-style Parmesan cheese
- 2 cups shredded mozzarella cheese for the filling
- 2 additional cups shredded mozzarella cheese for topping, divided
- 3 tablespoons fresh minced parsley
- Salt and black pepper, to taste
- 2 large eggs, whisked
- 1 box jumbo pasta shells, cooked, rinsed and cooled
- Approximately 4 cups of your favorite marinara sauce, divided
Instructions
- Preheat the oven to 375°F.
- Bring a large pot of salted water to a boil.
- Cook the jumbo pasta shells according to the package directions until al dente.
- Drain and rinse the shells under cool water. Set aside until cool enough to handle.
- In a large mixing bowl, combine the cottage cheese, powdered Parmesan, 2 cups shredded mozzarella and fresh parsley.
- Season with salt and black pepper to taste. Remember that the Parmesan and mozzarella already contain salt.
- Taste the cheese mixture BEFORE adding the raw eggs and adjust the seasoning as needed.
- Fold in the whisked eggs until the filling is thoroughly combined.
- Spread approximately 1 1/2 cups marinara sauce across the bottom of a 9 x 13-inch baking dish, or divide the sauce between smaller dishes if making multiple trays.
- Using a tablespoon, fill each cooled pasta shell generously with the cheese mixture.
- Arrange the stuffed shells in the sauce-lined baking dish.
- Repeat until the cheese filling is used, dividing the shells among baking dishes as necessary.
- Spoon approximately 1 cup additional marinara sauce over the shells, distributing the sauce between pans if using more than one.
- Sprinkle approximately 1 cup of the topping mozzarella over the shells.
- Bake at 375°F for approximately 45 minutes.
- Carefully remove the pan from the oven.
- Add the remaining marinara sauce and the remaining mozzarella cheese.
- Increase the oven temperature to 400°F.
- Return the pan to the oven and bake for approximately 15 additional minutes, until the sauce is bubbling, the cheese is melted and the center reaches 165°F.
- If desired, turn on the broiler briefly to brown the cheese. Watch carefully to prevent burning.
- Remove from the oven and let rest for approximately 5 to 10 minutes before serving.
Notes
- Cottage cheese: Small curd is my preference because it produces a more uniform, creamy filling. Large curd works too.
- Ricotta substitution: Use all ricotta or half ricotta and half cottage cheese if preferred.
- Marinara: Homemade or jarred marinara both work. Use whichever sauce you enjoy.
- Extra sauce: Keep some additional marinara available if you like especially saucy shells.
- Spinach variation: Fold in approximately 5 ounces cooked, chopped fresh spinach or a thawed and thoroughly squeezed 10-ounce package of frozen chopped spinach.
- Meat variation: Add approximately 1/2 pound fully cooked, drained and cooled ground beef, Italian sausage or ground chicken to the cheese filling. Extra filling may require additional shells.
- Meat sauce: Instead of adding meat to the filling, substitute your favorite prepared meat sauce for the marinara.
- Make ahead: Assemble and refrigerate covered up to one day before baking. Allow additional baking time for chilled shells.
- Freeze before baking: Assemble the shells in freezer-safe foil pans with sauce. Cover tightly and freeze. For best quality, use within 2 to 3 months.
- Thaw before baking: Thaw covered in the refrigerator, generally for approximately 24 hours or longer for large trays. Bake until the center reaches 165°F.
- Bake from frozen: In a metal or foil pan, remove plastic wrapping, cover with foil and bake at 375°F. Begin checking after 60 to 75 minutes. Add remaining sauce and cheese and finish uncovered. Total baking time may be 75 to 100 minutes or longer. The center must reach 165°F.
- Glass baking dishes: Avoid placing frozen glass directly into a hot oven unless specifically approved by the manufacturer.
- Freeze after baking: Cool promptly and freeze in airtight containers with additional sauce.
- Leftovers: Refrigerate promptly and use within 3 to 4 days.
- Reheating: Add a little sauce and reheat until the center reaches 165°F.
Frequently Asked Questions
Why do you use cottage cheese instead of ricotta?
I prefer cottage cheese because it keeps the filling moist and creamy while the shells bake. I find that it helps prevent the filling from becoming dry or crumbly.
Does cottage cheese taste different from ricotta?
They have similar mild dairy flavors, but cottage cheese is generally a little tangier and has a different texture.
Once it’s combined with Parmesan, mozzarella, seasonings and marinara, the difference in flavor is fairly subtle.
Should I use small curd or large curd cottage cheese?
Either works.
I prefer small curd because it creates a more uniform filling and is easier to spoon into the shells.
Can I blend large curd cottage cheese?
Yes. You can briefly pulse it in a food processor or mash it with a fork if you want a smoother filling.
Can I use ricotta instead?
Absolutely. You can substitute ricotta for the cottage cheese or use half of each.
Can I use low-fat cottage cheese?
You can, although I prefer full-fat cottage cheese for the richest, creamiest filling.
Do I have to use homemade marinara?
No. Use any marinara sauce you like.
Can I use meat sauce?
Yes. Meat sauce is delicious with these shells.
Can I add spinach?
Yes. Cook fresh spinach or thaw frozen spinach, squeeze out the excess moisture and fold it into the cheese filling.
Can I add Italian sausage?
Yes. Cook and crumble the sausage, drain it, cool it and fold it into the filling.
Can I add ground beef?
Absolutely. Make sure the ground beef is fully cooked and drained before adding it to the cheese mixture.
Can I make these vegetarian?
Yes. Use a meat-free marinara and check that your cheeses are made with vegetarian-friendly enzymes if needed.
Do I need to boil the shells first?
Yes. This recipe uses cooked jumbo pasta shells.
Why are my shells tearing?
They may have been overcooked or stuck together while boiling.
Cook them just until al dente and handle them gently.
Can I prepare these the night before?
Yes. Assemble the dish, cover and refrigerate. Bake the next day until the center reaches 165°F.
Can I freeze Stuffed Shells before baking?
Yes. This is my preferred way to freeze them.
Can I freeze them after baking?
Yes. Cool them promptly, package them with extra sauce and freeze.
Do I have to thaw frozen Stuffed Shells before baking?
No. You can bake them directly from frozen in an oven-safe metal or foil pan.
How long do frozen Stuffed Shells take to bake?
A frozen tray may take approximately 75 to 100 minutes or longer, depending on the pan size and depth. Bake covered for the first part, then uncover and finish with additional sauce and cheese. The center must reach 165°F.
Can I freeze them in a glass baking dish?
Only if the dish is freezer-safe, and you must follow its manufacturer’s instructions regarding temperature changes. I prefer disposable aluminum pans for freezing and baking.
How long can I keep Stuffed Shells in the freezer?
For best quality, use them within approximately two to three months.
Can I double or triple the recipe?
Absolutely. I do it all the time.
Just use multiple baking dishes rather than overfilling one pan.
A Little Extra Work for a Lot of Love
I know these Stuffed Shells take a little more effort than most of my recipes.
You have to cook the pasta.
Mix the filling.
Stuff the shells.
Arrange them in the pans.
Add the sauce and cheese.
But this is one of those recipes where the work really pays off.
You end up with a delicious dinner, possibly a few extra meals in the freezer, and maybe even a tray or two to share with someone you love.
And that’s why I keep making them.
A couple of times a year, I declare it Stuffed Shells Day.
And everyone knows something good is coming out of my kitchen.
3 Comments
Barbara Rivet
December 20, 2025 at 7:55 pm
I made this today. My first Tipsy recipe. It was delicious. For the sauce I used Mids Italian sausage spaghetti sauce. That alone guaranteed deliciousness. I just baked it at 375° for an hour. Since its just me and the husband, I divided it into 5 small aluminum pans and froze 4 of them.
The filling would be good in lasagna, lasagna rollups or manicotti.
Karen Meehan
October 9, 2026 at 9:01 am
This is a go to meal when I am feeding my crew. I make 4 pans with my homemade meat sauce. Grandson is allergic to eggs so I make his w/o eggs and us some Italian bread crumbs as a binder. My hubby likes these better than lasagna because he likes everything so hot it burns his mouth! He says they heat up better than lasagna.
April Lee Wiencek
October 10, 2026 at 1:34 pm
Love this comment!!!