
Pizza Roll-Ups
A Snackable Recipe Everyone Will Love

If you’ve ever had a string cheese stick and thought “What if this was wrapped in pizza?” then this recipe is for you. These crispy, buttery Pizza Roll-Ups are loaded with melty cheese, pepperoni, and pizza sauce, making them the perfect easy snack, lunch, or late-night bite that both kids and adults will devour.
These easy Pizza Roll-Ups have been one of my favorite quick meals for years. Mr. Tipsy plays softball a couple nights a week, and I love having something ready that he can grab on the way out the door.
They’re just as good after they’ve cooled down, which makes them perfect for lunches, snacks, and busy evenings. I almost always have these simple ingredients on hand, so they’re a go-to recipe when I need something fast.
This recipe actually goes all the way back to my days working for the Chicago Park District. This is where I taught a Kids in the Kitchen cooking class.
The kids loved making them because they’re simple, fun, and delicious. All these years later they’re still one of my favorite easy recipes.
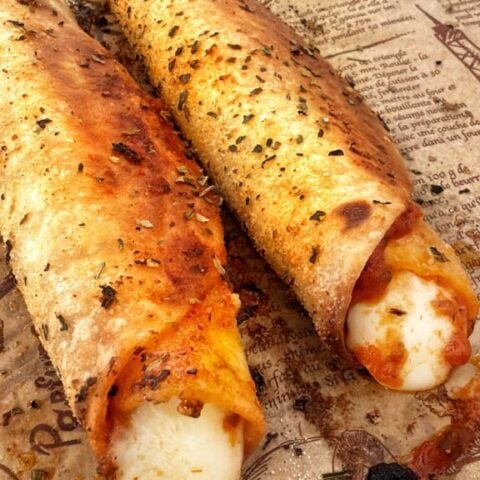
A Good Roll Is Key
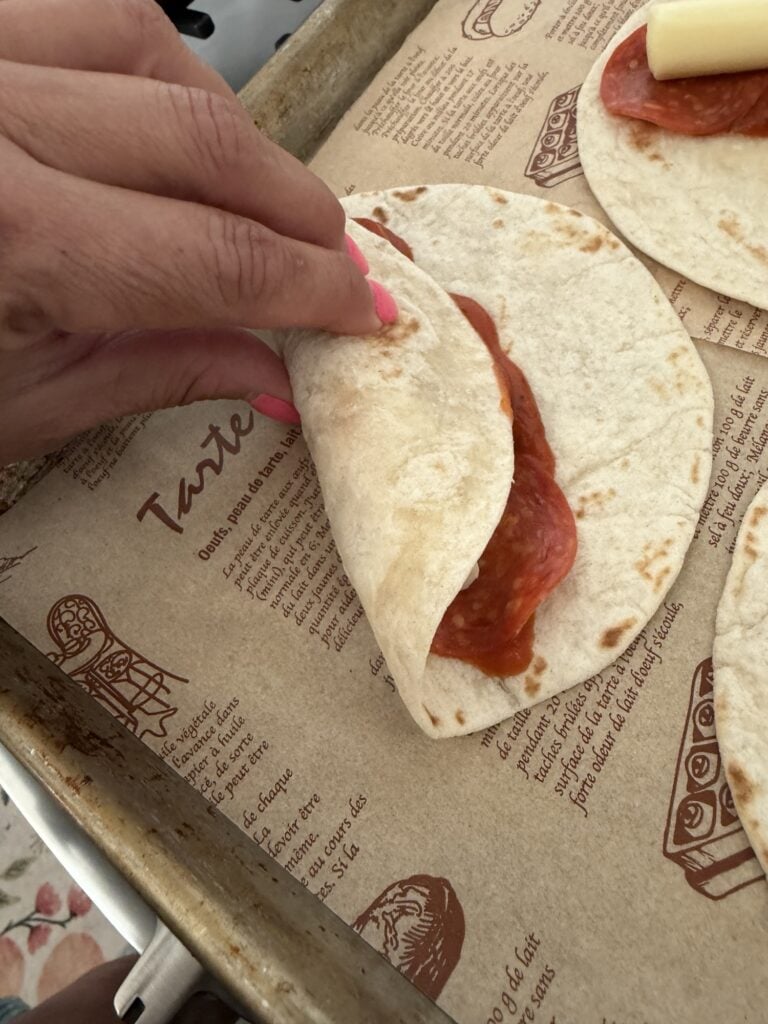
The key to getting those beautiful layered rolls is to think of it as a “tuck and roll.” This is better than simply wrapping the tortilla around the filling.
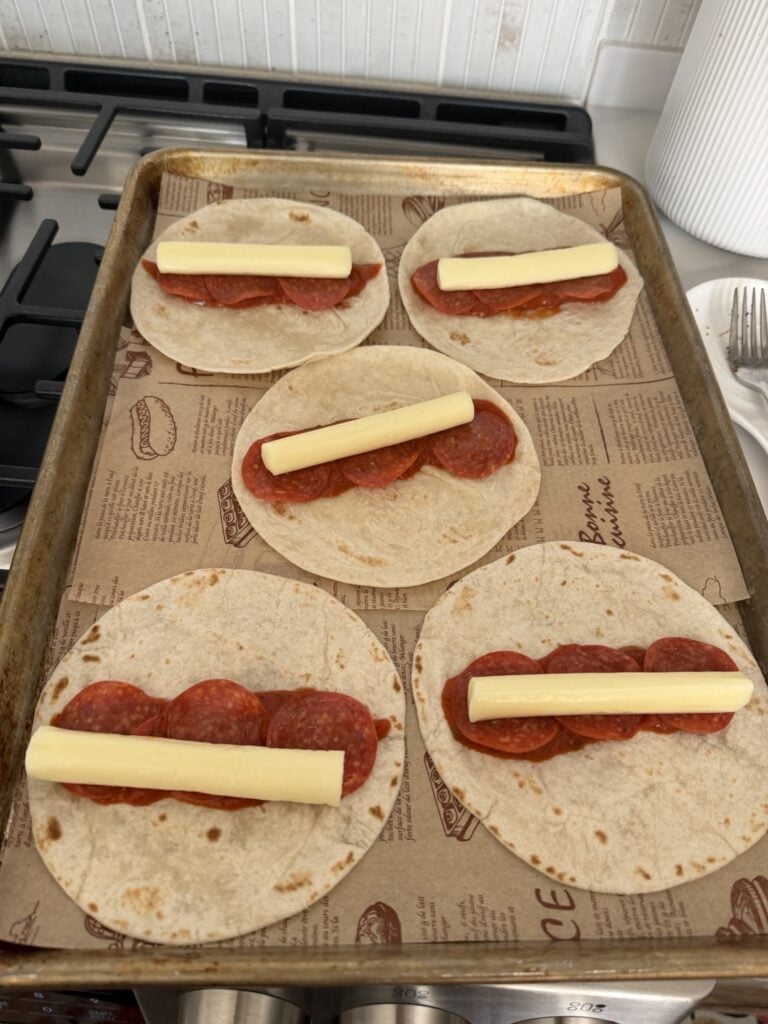
After placing the sauce, pepperoni, and string cheese down the center, fold one side of the tortilla over the string cheese. Next gently tuck the edge slightly underneath the cheese stick.
This first tuck creates the tight center spiral that gives the roll-up its layered appearance when sliced or bitten into. Continue rolling forward tightly, keeping gentle pressure on the tortilla as you go.
You want the tortilla snug enough to create layers around the cheese. Do not roll so tight that the filling squeezes out.
When finished, place the roll seam-side down on the baking sheet so the weight of the roll helps seal it during baking. If you roll them tightly and keep the sauce amount modest, you’ll end up with crispy golden layers on the outside and perfectly melted cheese wrapped in multiple thin layers of tortilla on the inside.
Kid Friendly
One of the reasons I still love this recipe after all these years is that it’s incredibly kid-friendly. Young children can help spread the sauce, layer the pepperoni, place the string cheese, brush on the butter, and sprinkle the basil.
This will make it a fun way to get them involved in the kitchen.
For older kids and teenagers, this is also a great recipe to print out and leave on the counter for them to make on their own. The ingredients are simple, the steps are easy to follow, and the end result is a hot meal or snack they can feel proud of making themselves.
It’s the kind of recipe that helps build confidence in the kitchen without requiring complicated techniques or a long list of ingredients.
A great salad that even kids can make, that goes well with these pizza roll-up is my Pizza Salad!
Another Affordable Aldi Recipe
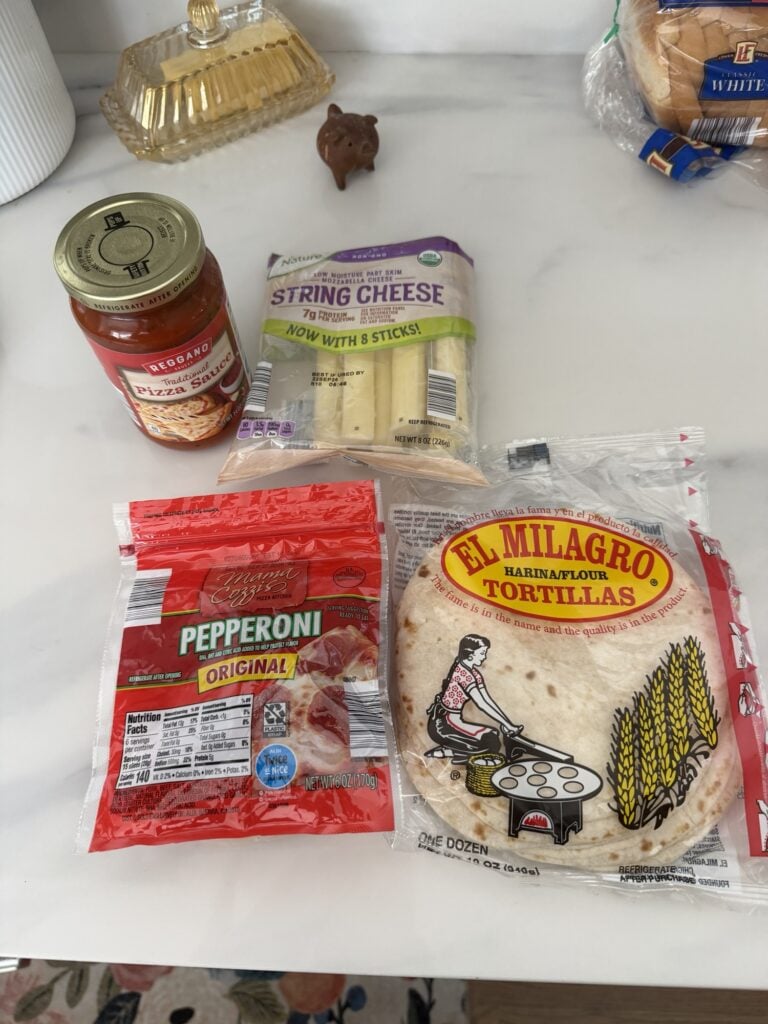
Another reason I make these Pizza Roll-Ups so often is that I keep every single ingredient on hand from Aldi. A package of tortillas, string cheese, pizza sauce, pepperoni, butter, and a few pantry seasonings are all it takes.
I can usually make a batch of six for around $5 or less.
Having these inexpensive ingredients stocked in my refrigerator and pantry means I can throw together a quick snack, lunch, or easy dinner without making a special trip to the store. When you break it down, each roll-up costs well under a dollar.
This makes it one of my favorite budget-friendly recipes for hungry kids, teenagers, and softball-playing husbands alike.
Pizza Roll-Ups Recipe
These crispy Pizza Roll-Ups are made with flour tortillas, string cheese, pepperoni, and pizza sauce, then brushed with buttery basil topping and baked until golden brown. They're an easy, kid-friendly snack, lunch, or party appetizer that delivers all the flavors of pizza in a handheld, dippable bite.
Ingredients
- 6 to 8 small flour tortillas (approximately 6-inch)
- 6 to 8 string cheese sticks
- 12 to 16 tablespoons pizza sauce (about 2 tablespoons per tortilla)
- 24 to 32 slices pepperoni (3 to 4 slices per tortilla)
- 3 tablespoons butter, melted
- 1 teaspoon dried basil
- Optional: garlic salt, to taste
- Extra pizza sauce for dipping
Instructions
- Preheat your oven to 400 degrees.
- Line a baking sheet with parchment paper.
- Warm each tortilla in a dry skillet over medium-low heat for about 10 to 15 seconds per side, just until soft and pliable. Do not brown them.
- Spread about 2 tablespoons of pizza sauce down the center of each tortilla.
- Place 3 to 4 slices of pepperoni over the sauce.
- Lay one string cheese stick on top of the pepperoni.
- Fold the tortilla over the string cheese, tucking the edge slightly underneath the cheese, then roll tightly. Place seam-side down on the prepared baking sheet. Repeat with remaining tortillas.
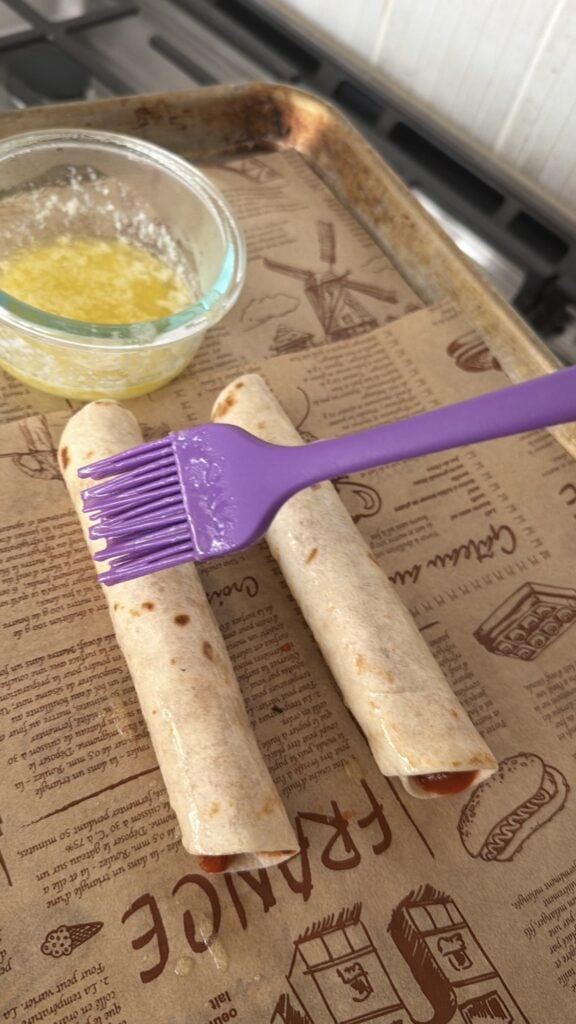
- Melt the butter and season it with a little garlic salt if desired.
- Generously brush each roll-up with the melted butter.
- Sprinkle the tops with dried basil.
- Bake for about 6 minutes, or until the seam has sealed and the bottoms begin to turn golden.
- Carefully turn each roll-up over.
- Brush the tops with some of the melted butter from the pan and sprinkle with a little more basil.
- Bake for another 1 to 2 minutes, or until golden brown and crispy all over.
- Remove from the oven and allow them to cool for a few minutes before serving.
- Serve with warm pizza sauce for dipping if desired.
Notes
- Do not overfill with sauce or it may leak out and burn on the baking sheet.
- If you notice excessive cheese leaking during baking, your oven may run hot. Reduce the temperature slightly next time.
- A little cheese escaping is perfectly normal and creates those crispy cheese bits everyone fights over.
- These reheat beautifully in the toaster oven, air fryer, or microwave.
- You can easily double or triple this recipe for parties, game days, or feeding hungry teenagers.